


Great hardware for all your multi piece assembly needs!
Use these guys whenever i got split rims and they smash it every time
Solid product and fast shipping thank you again
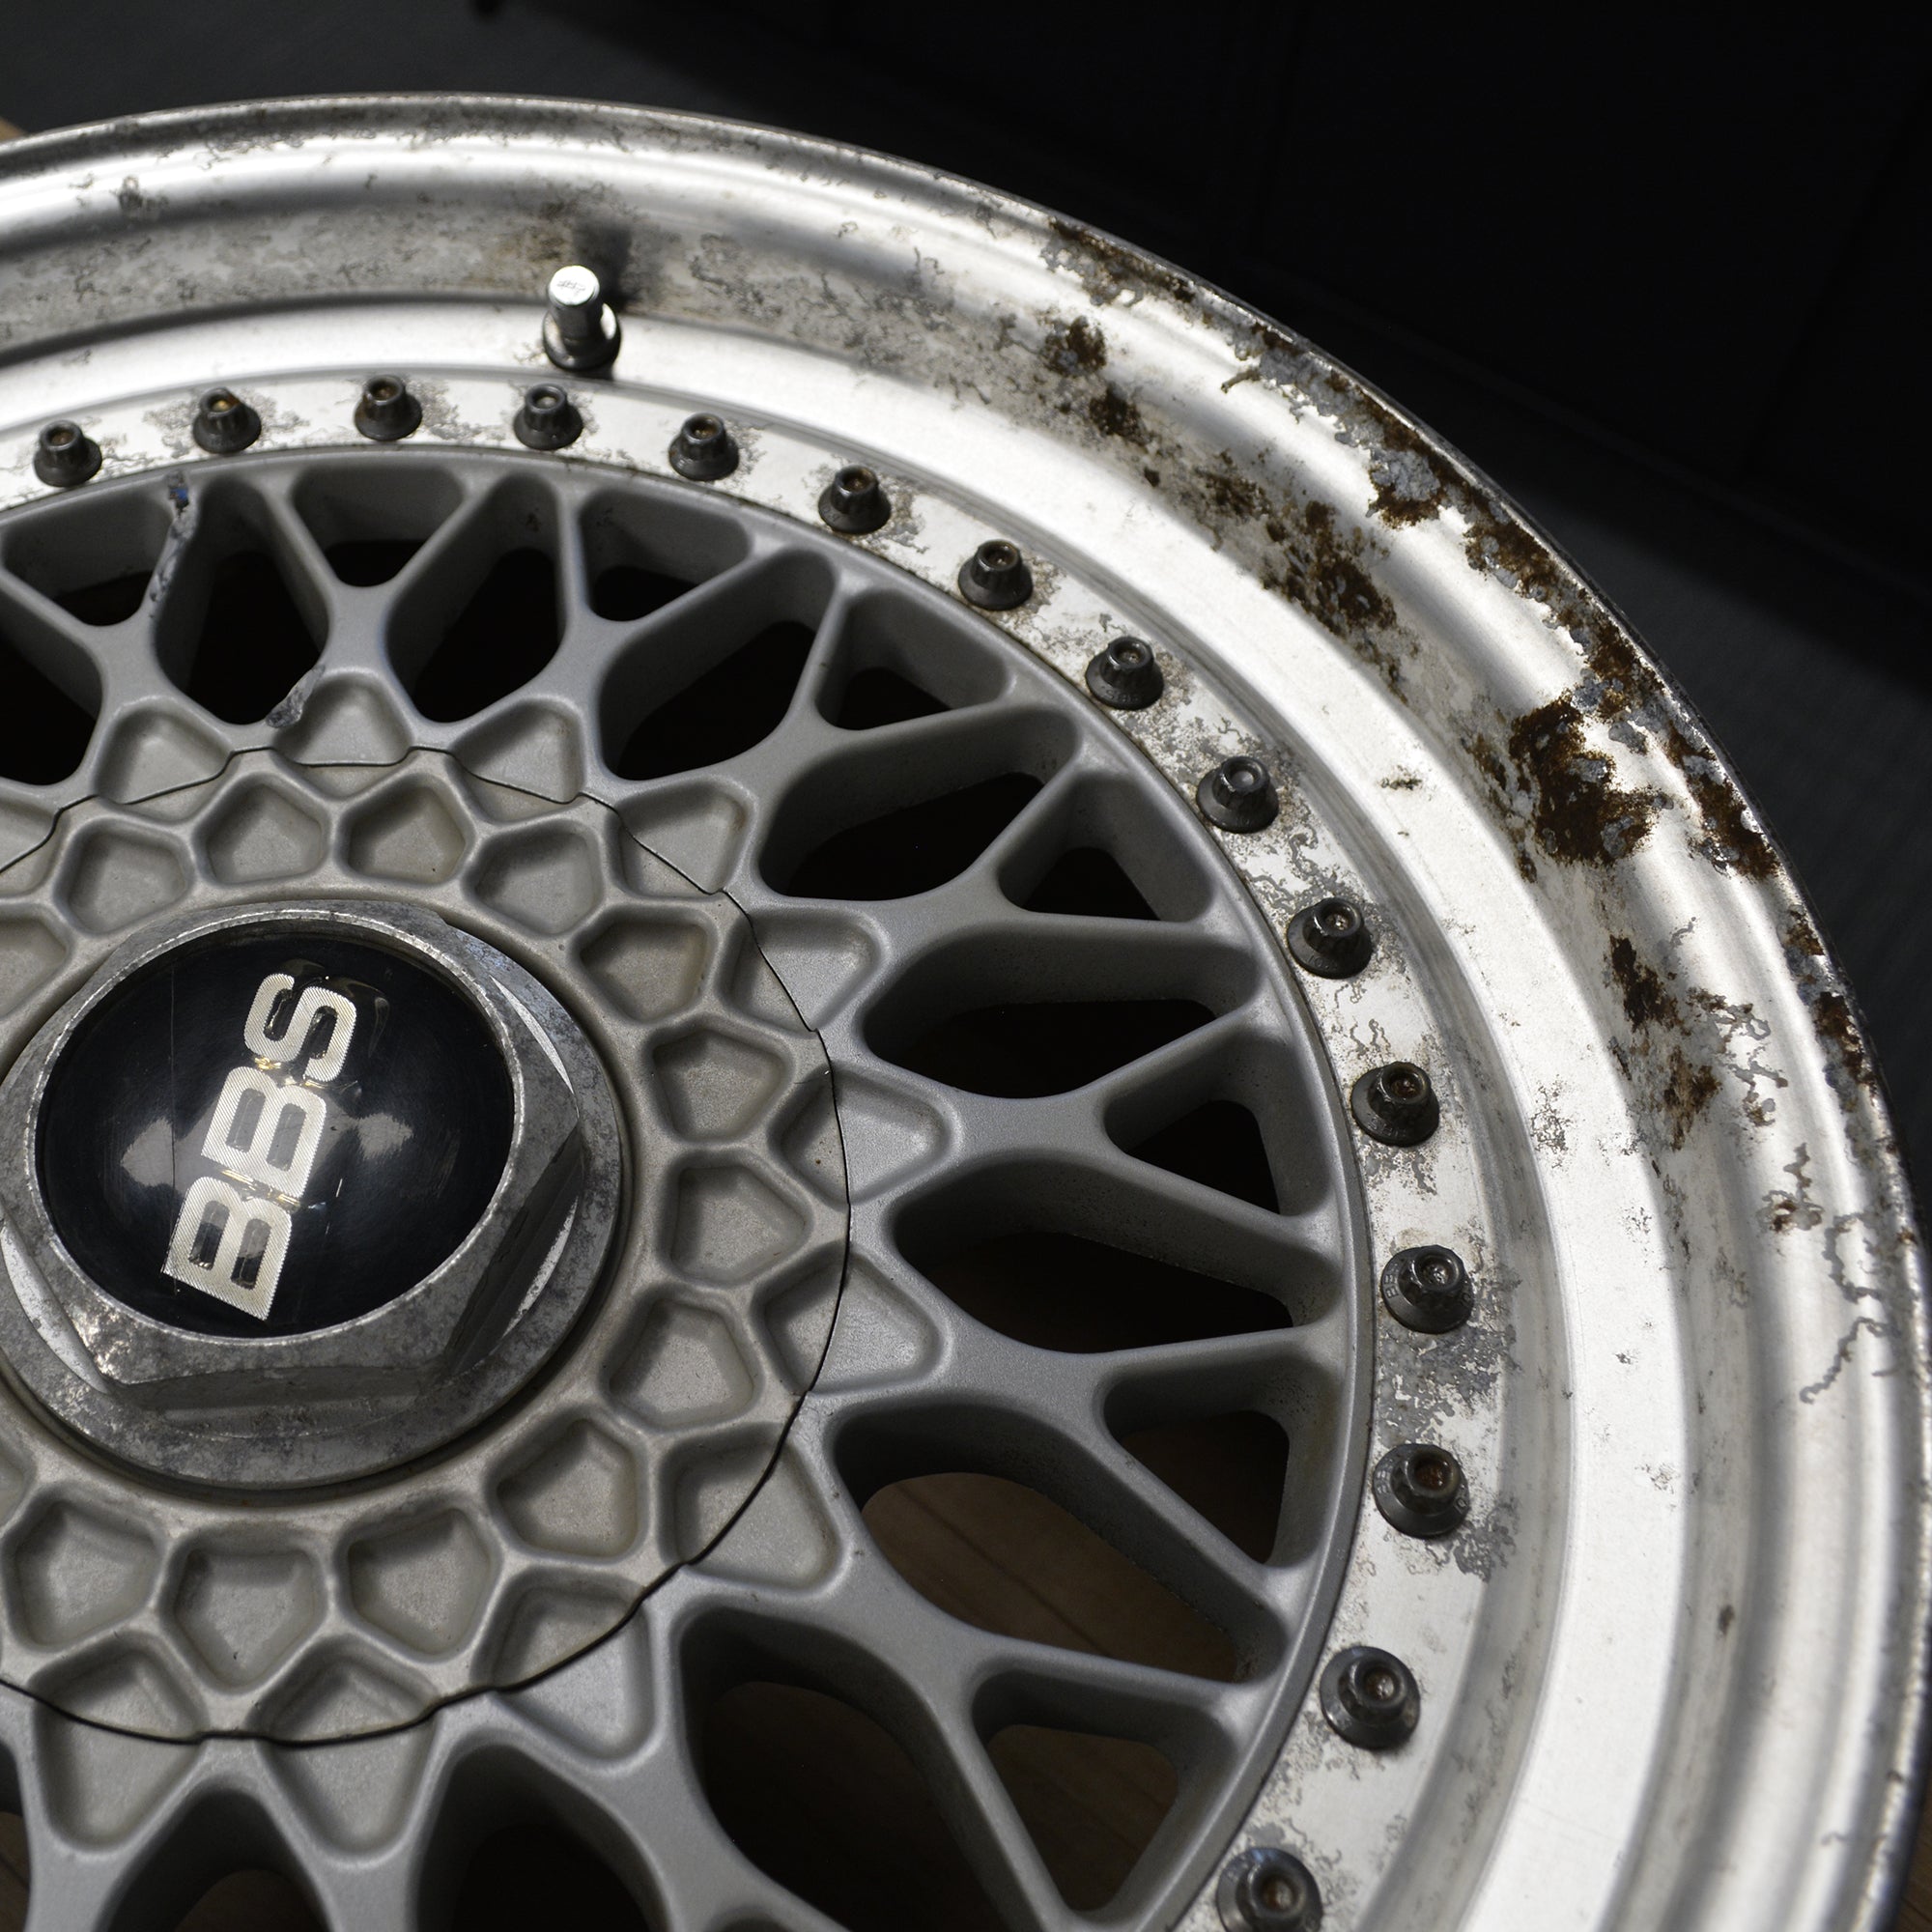
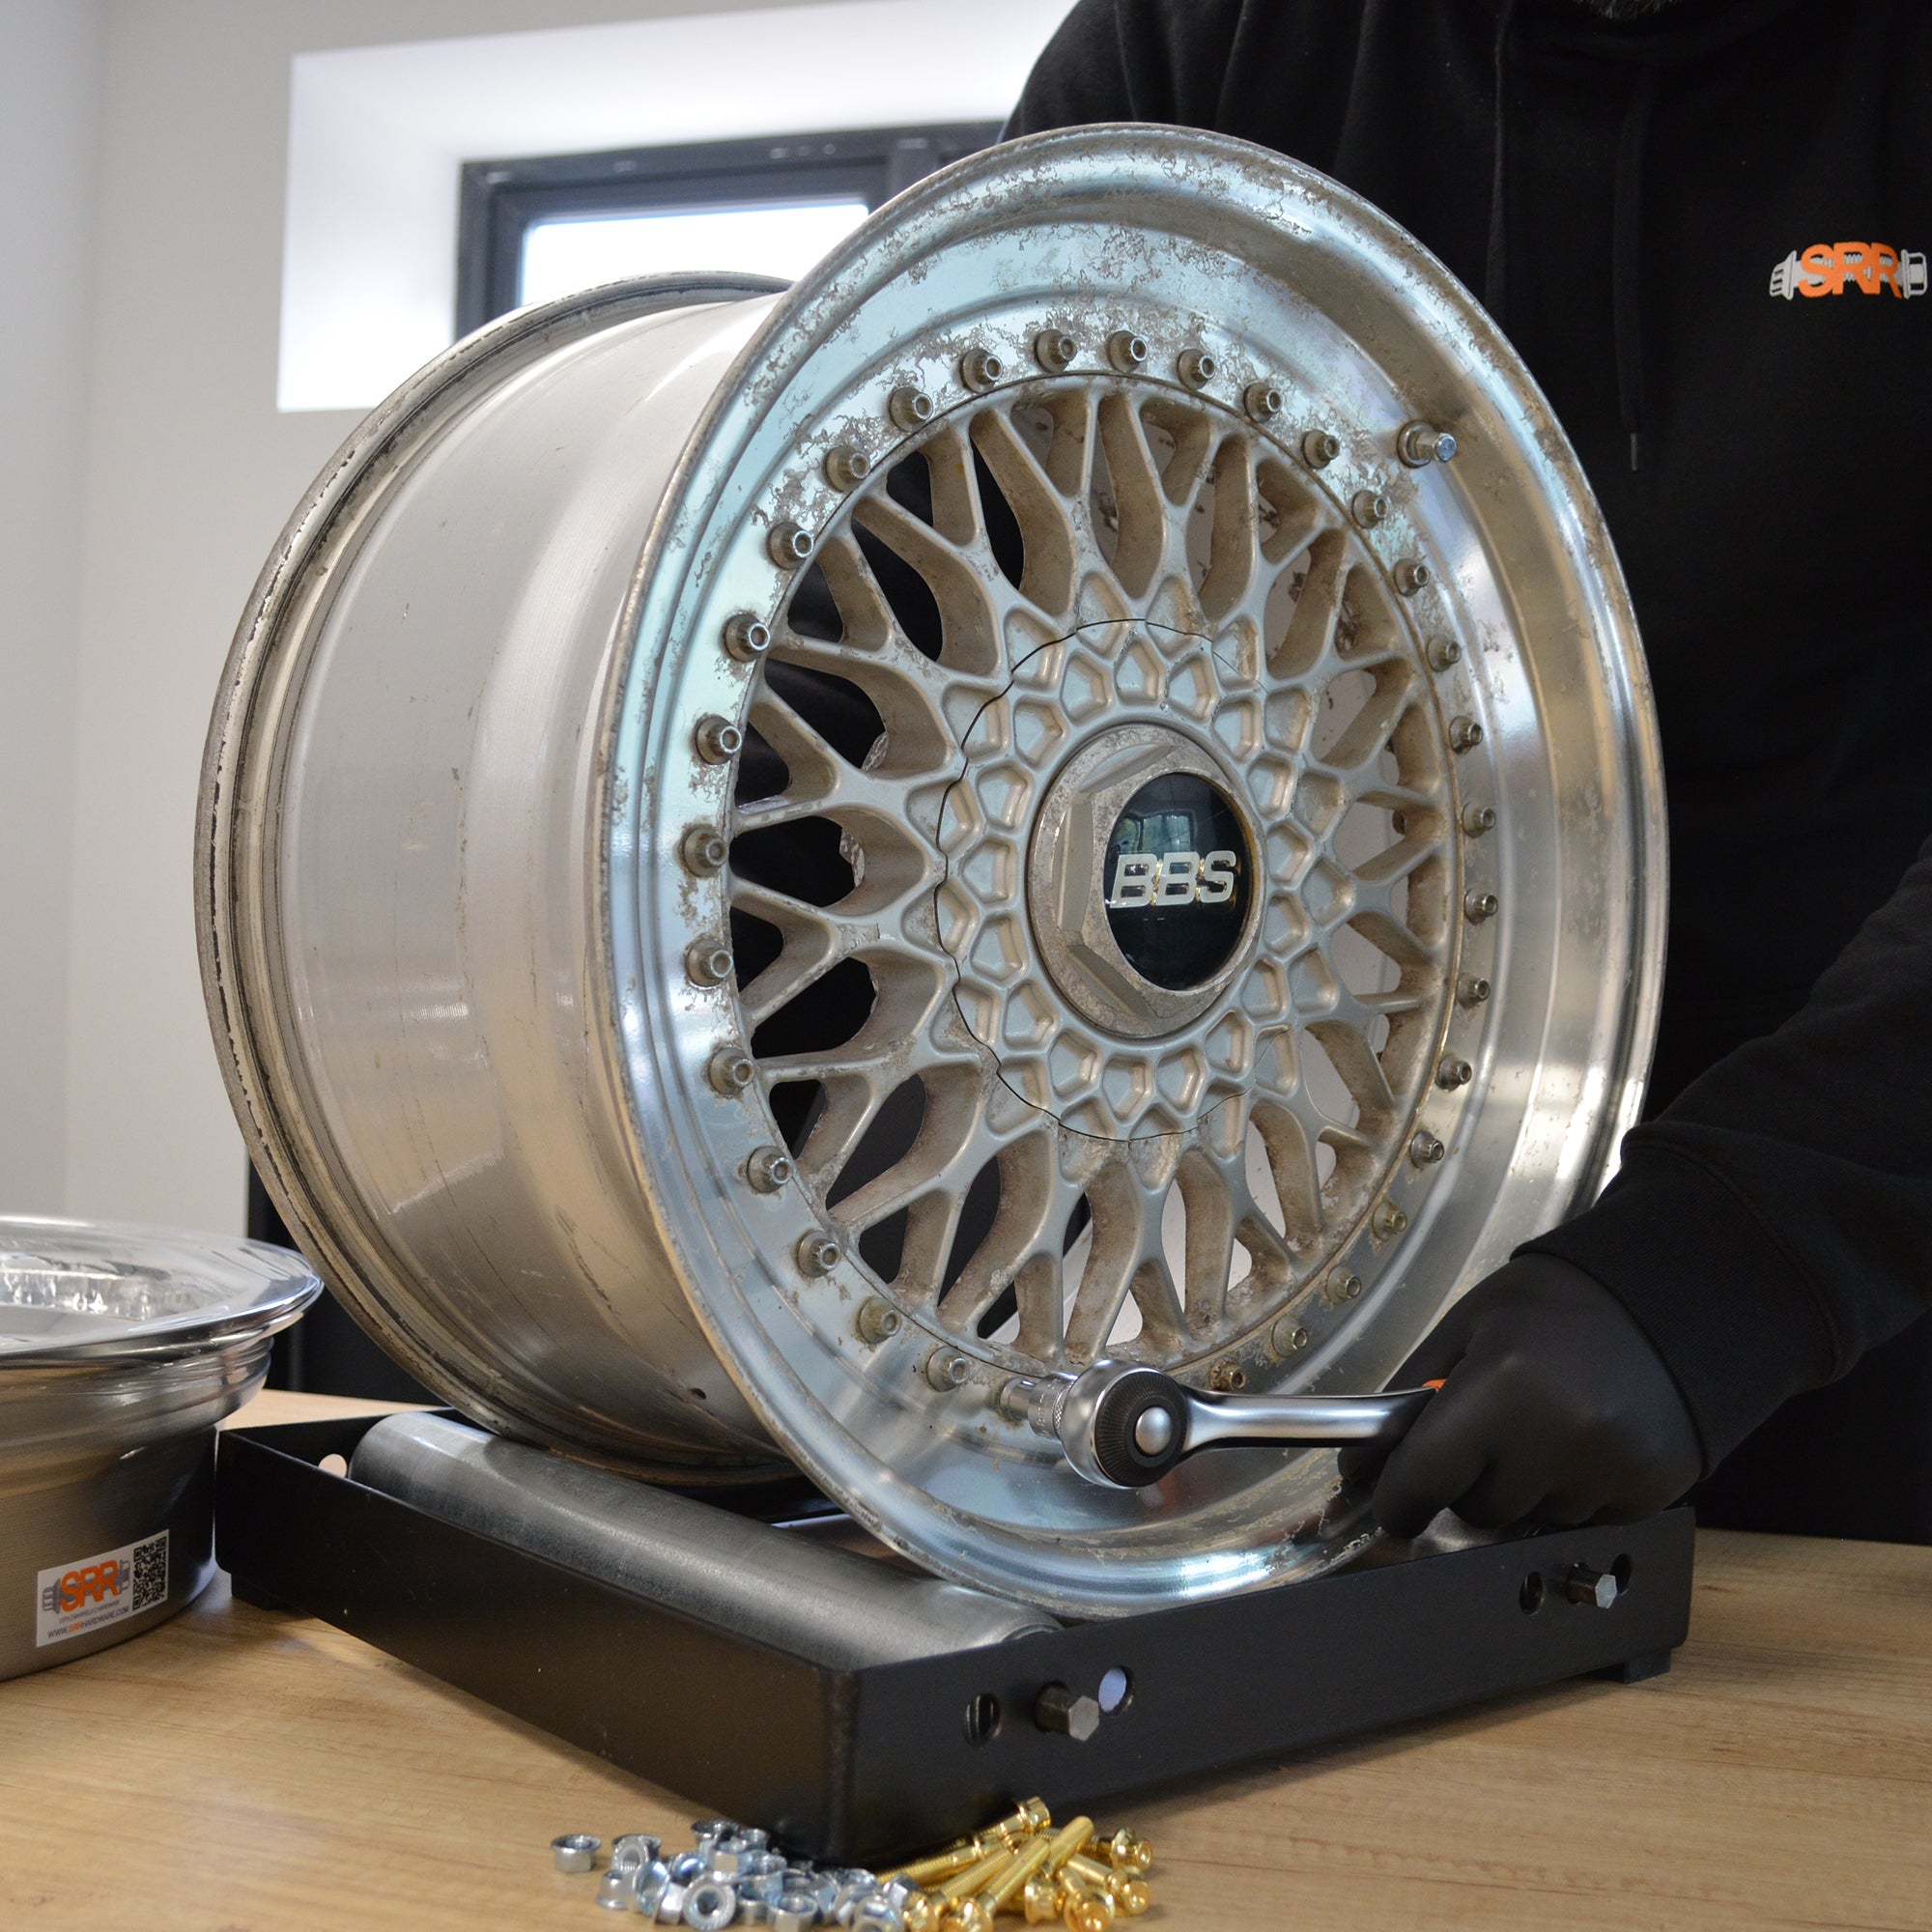
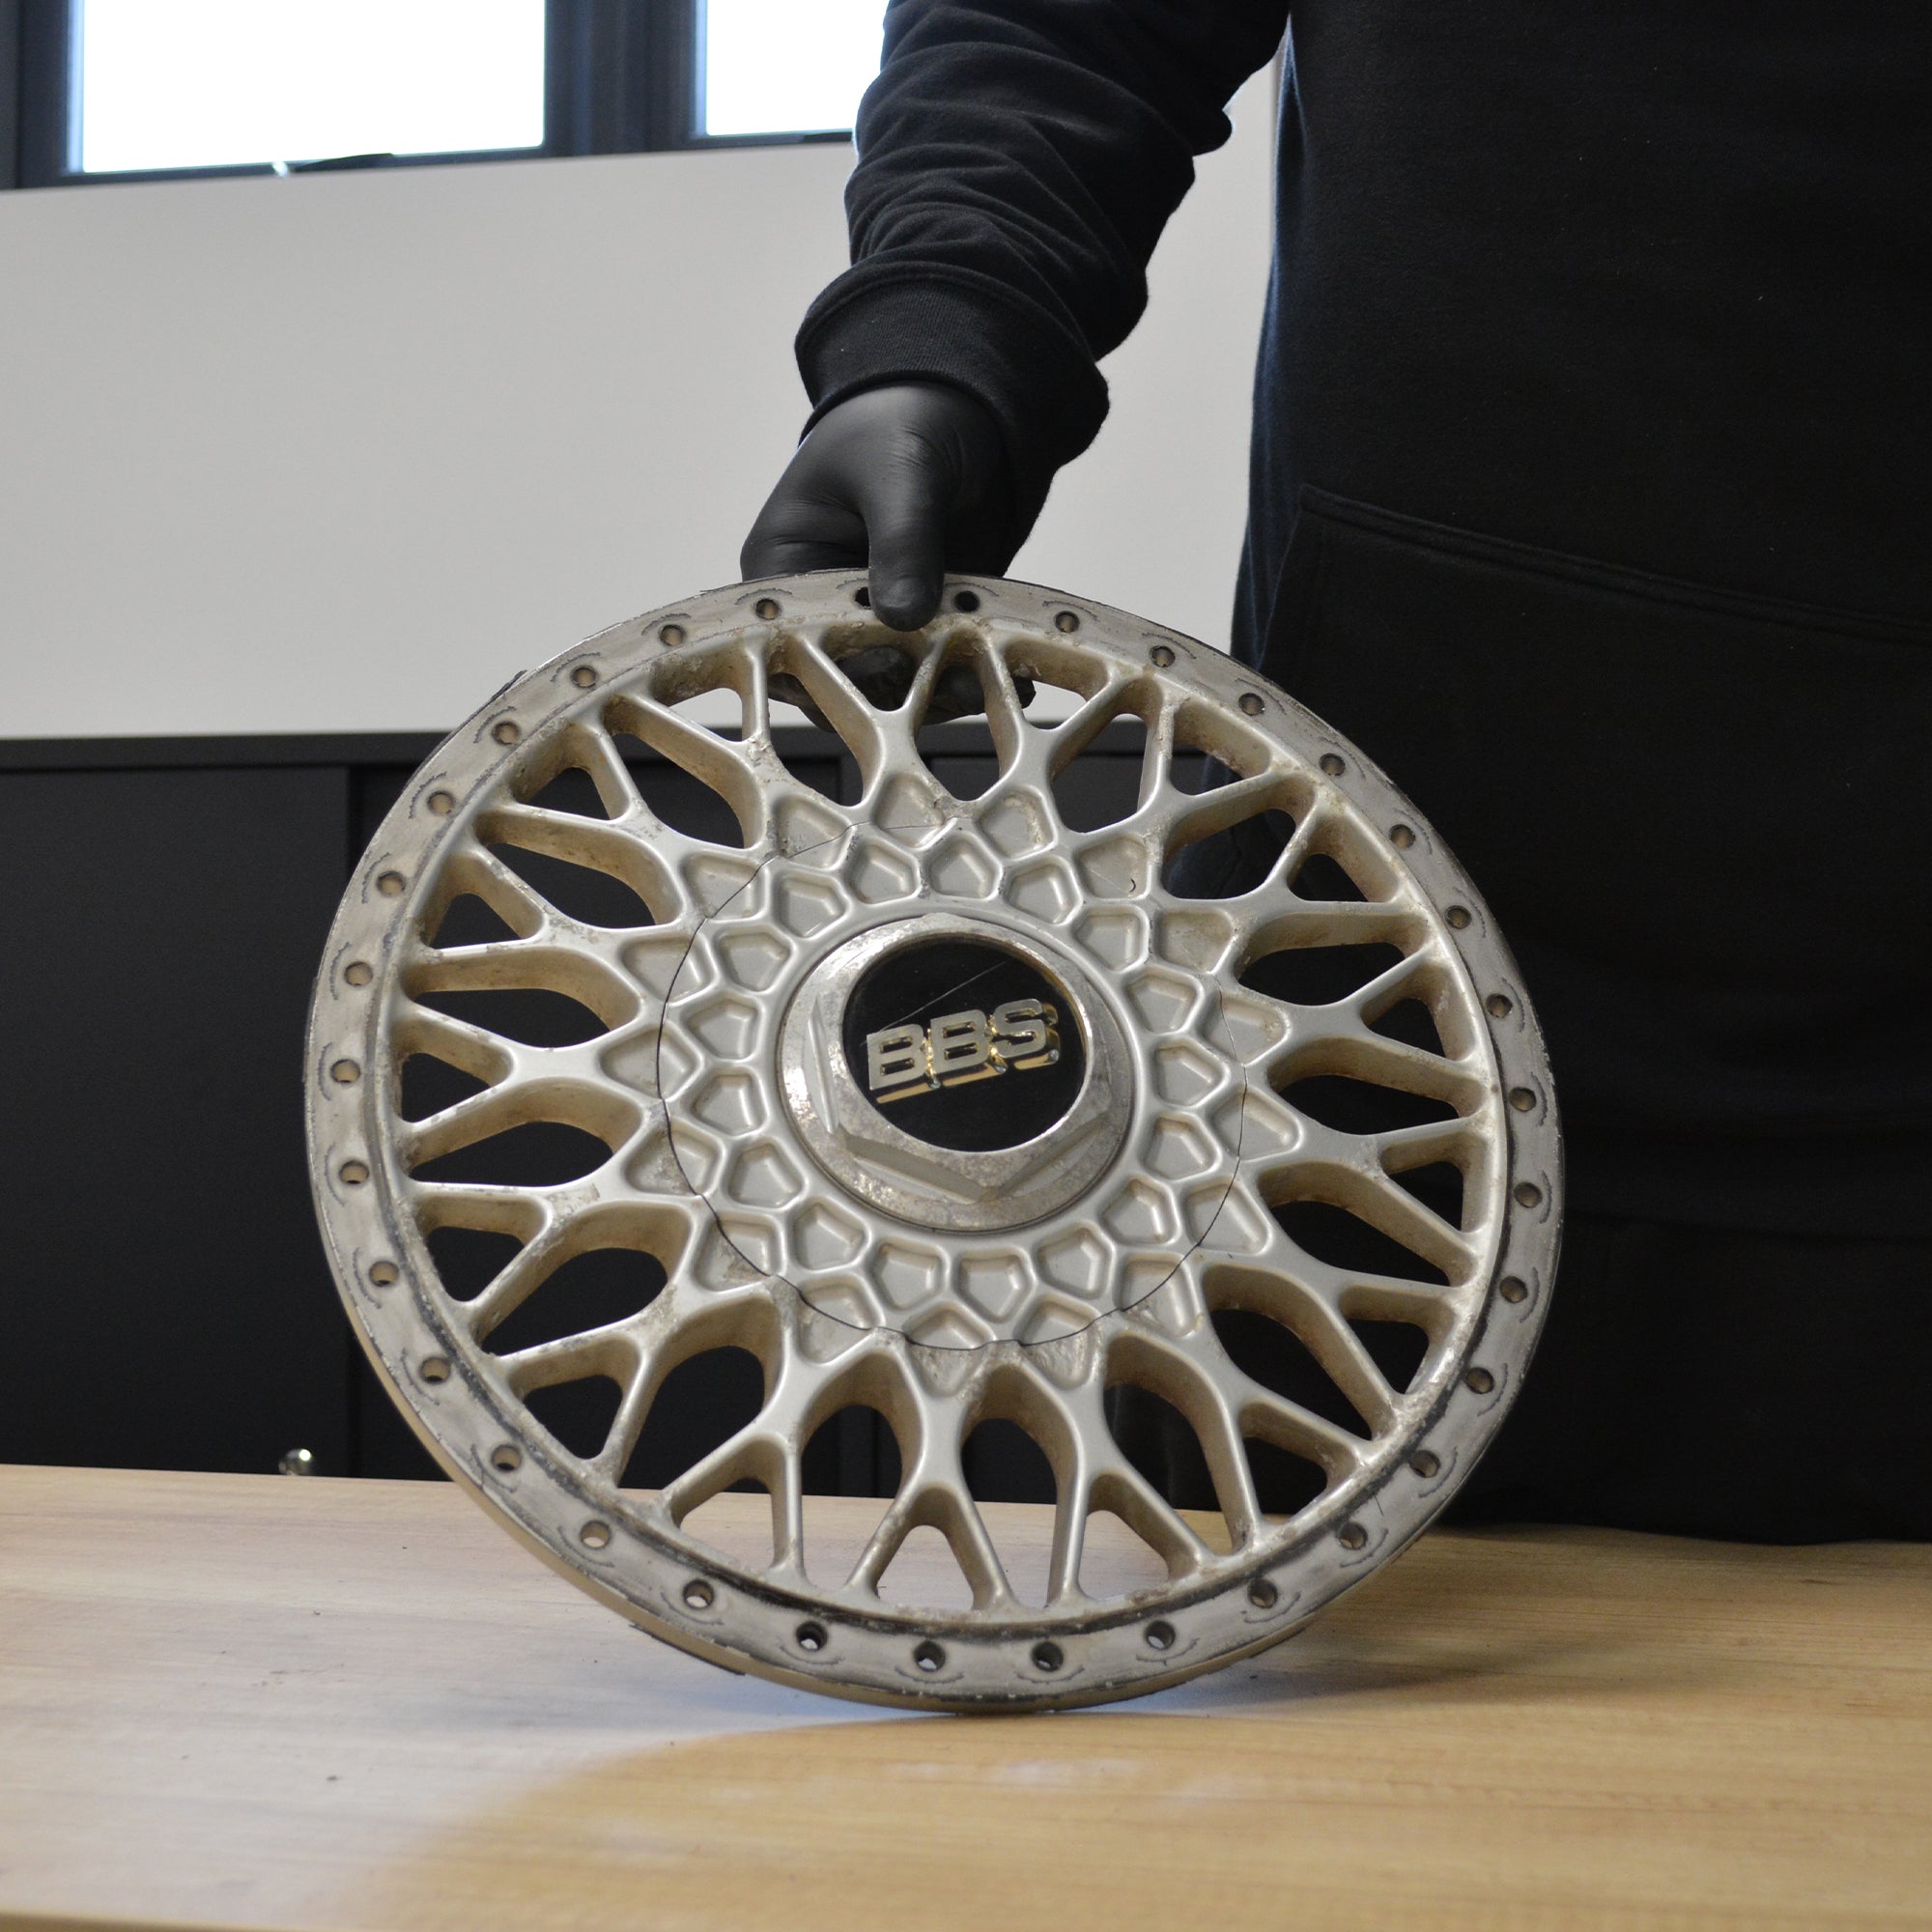
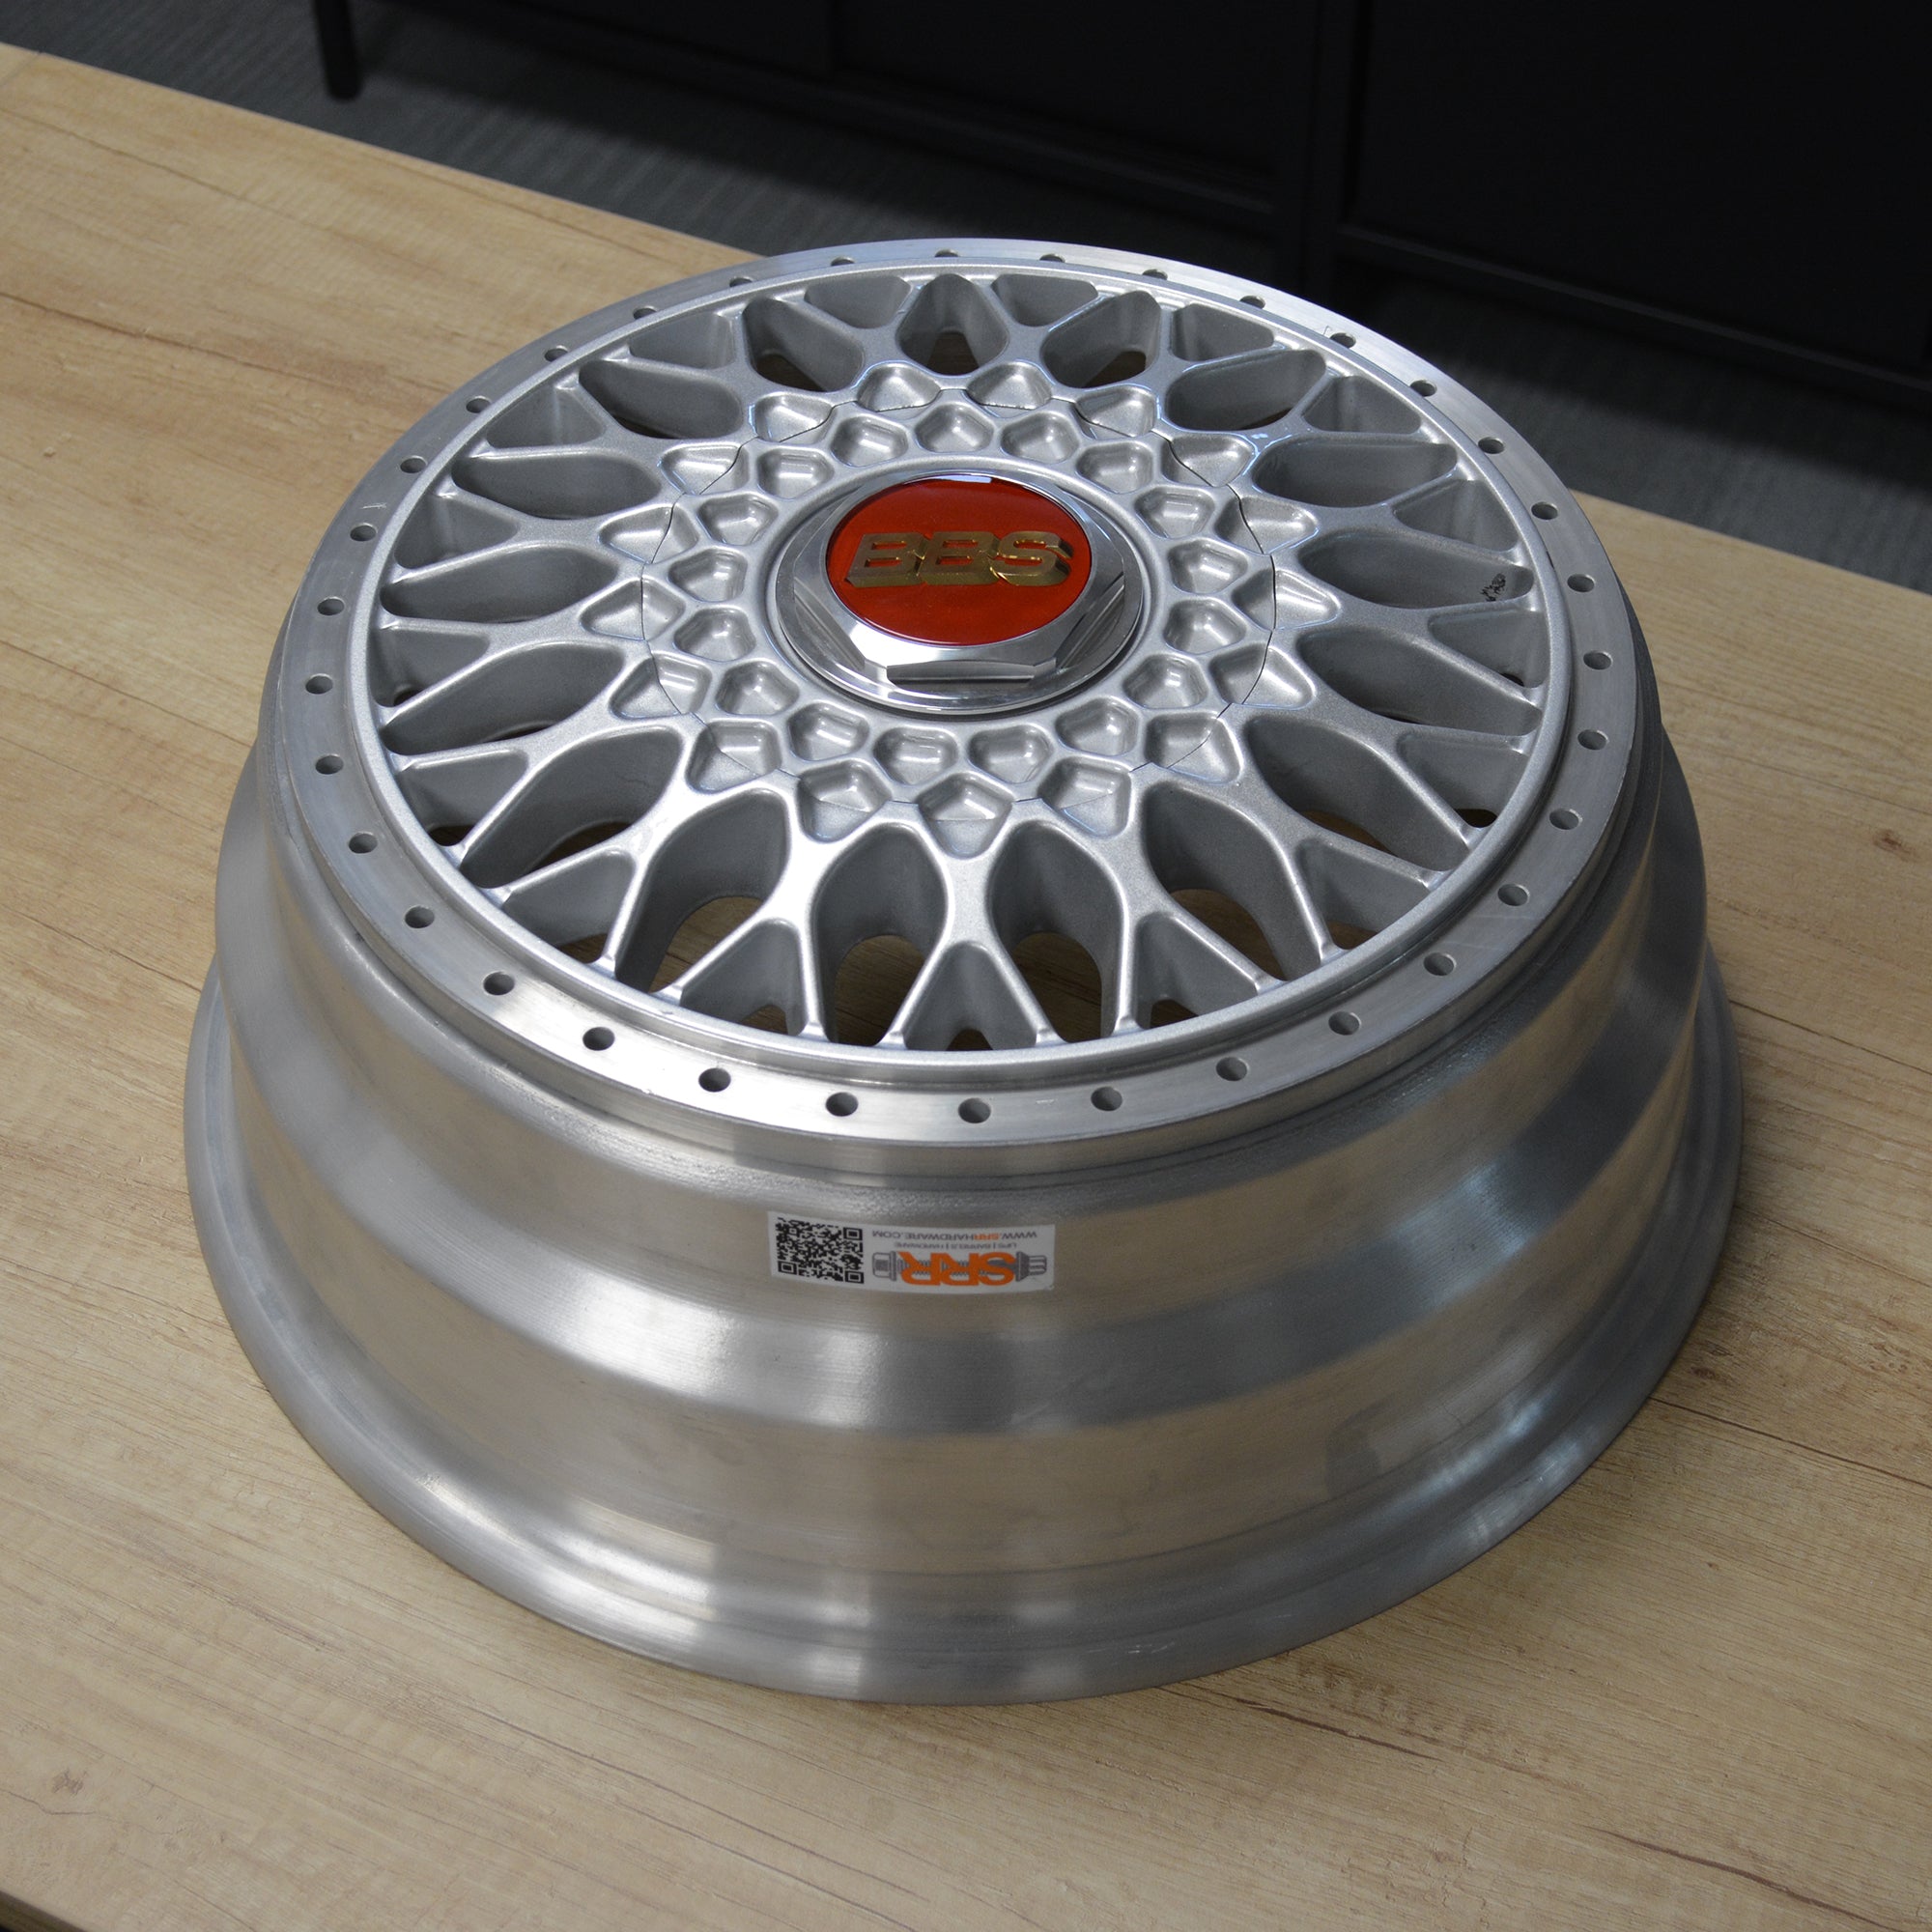
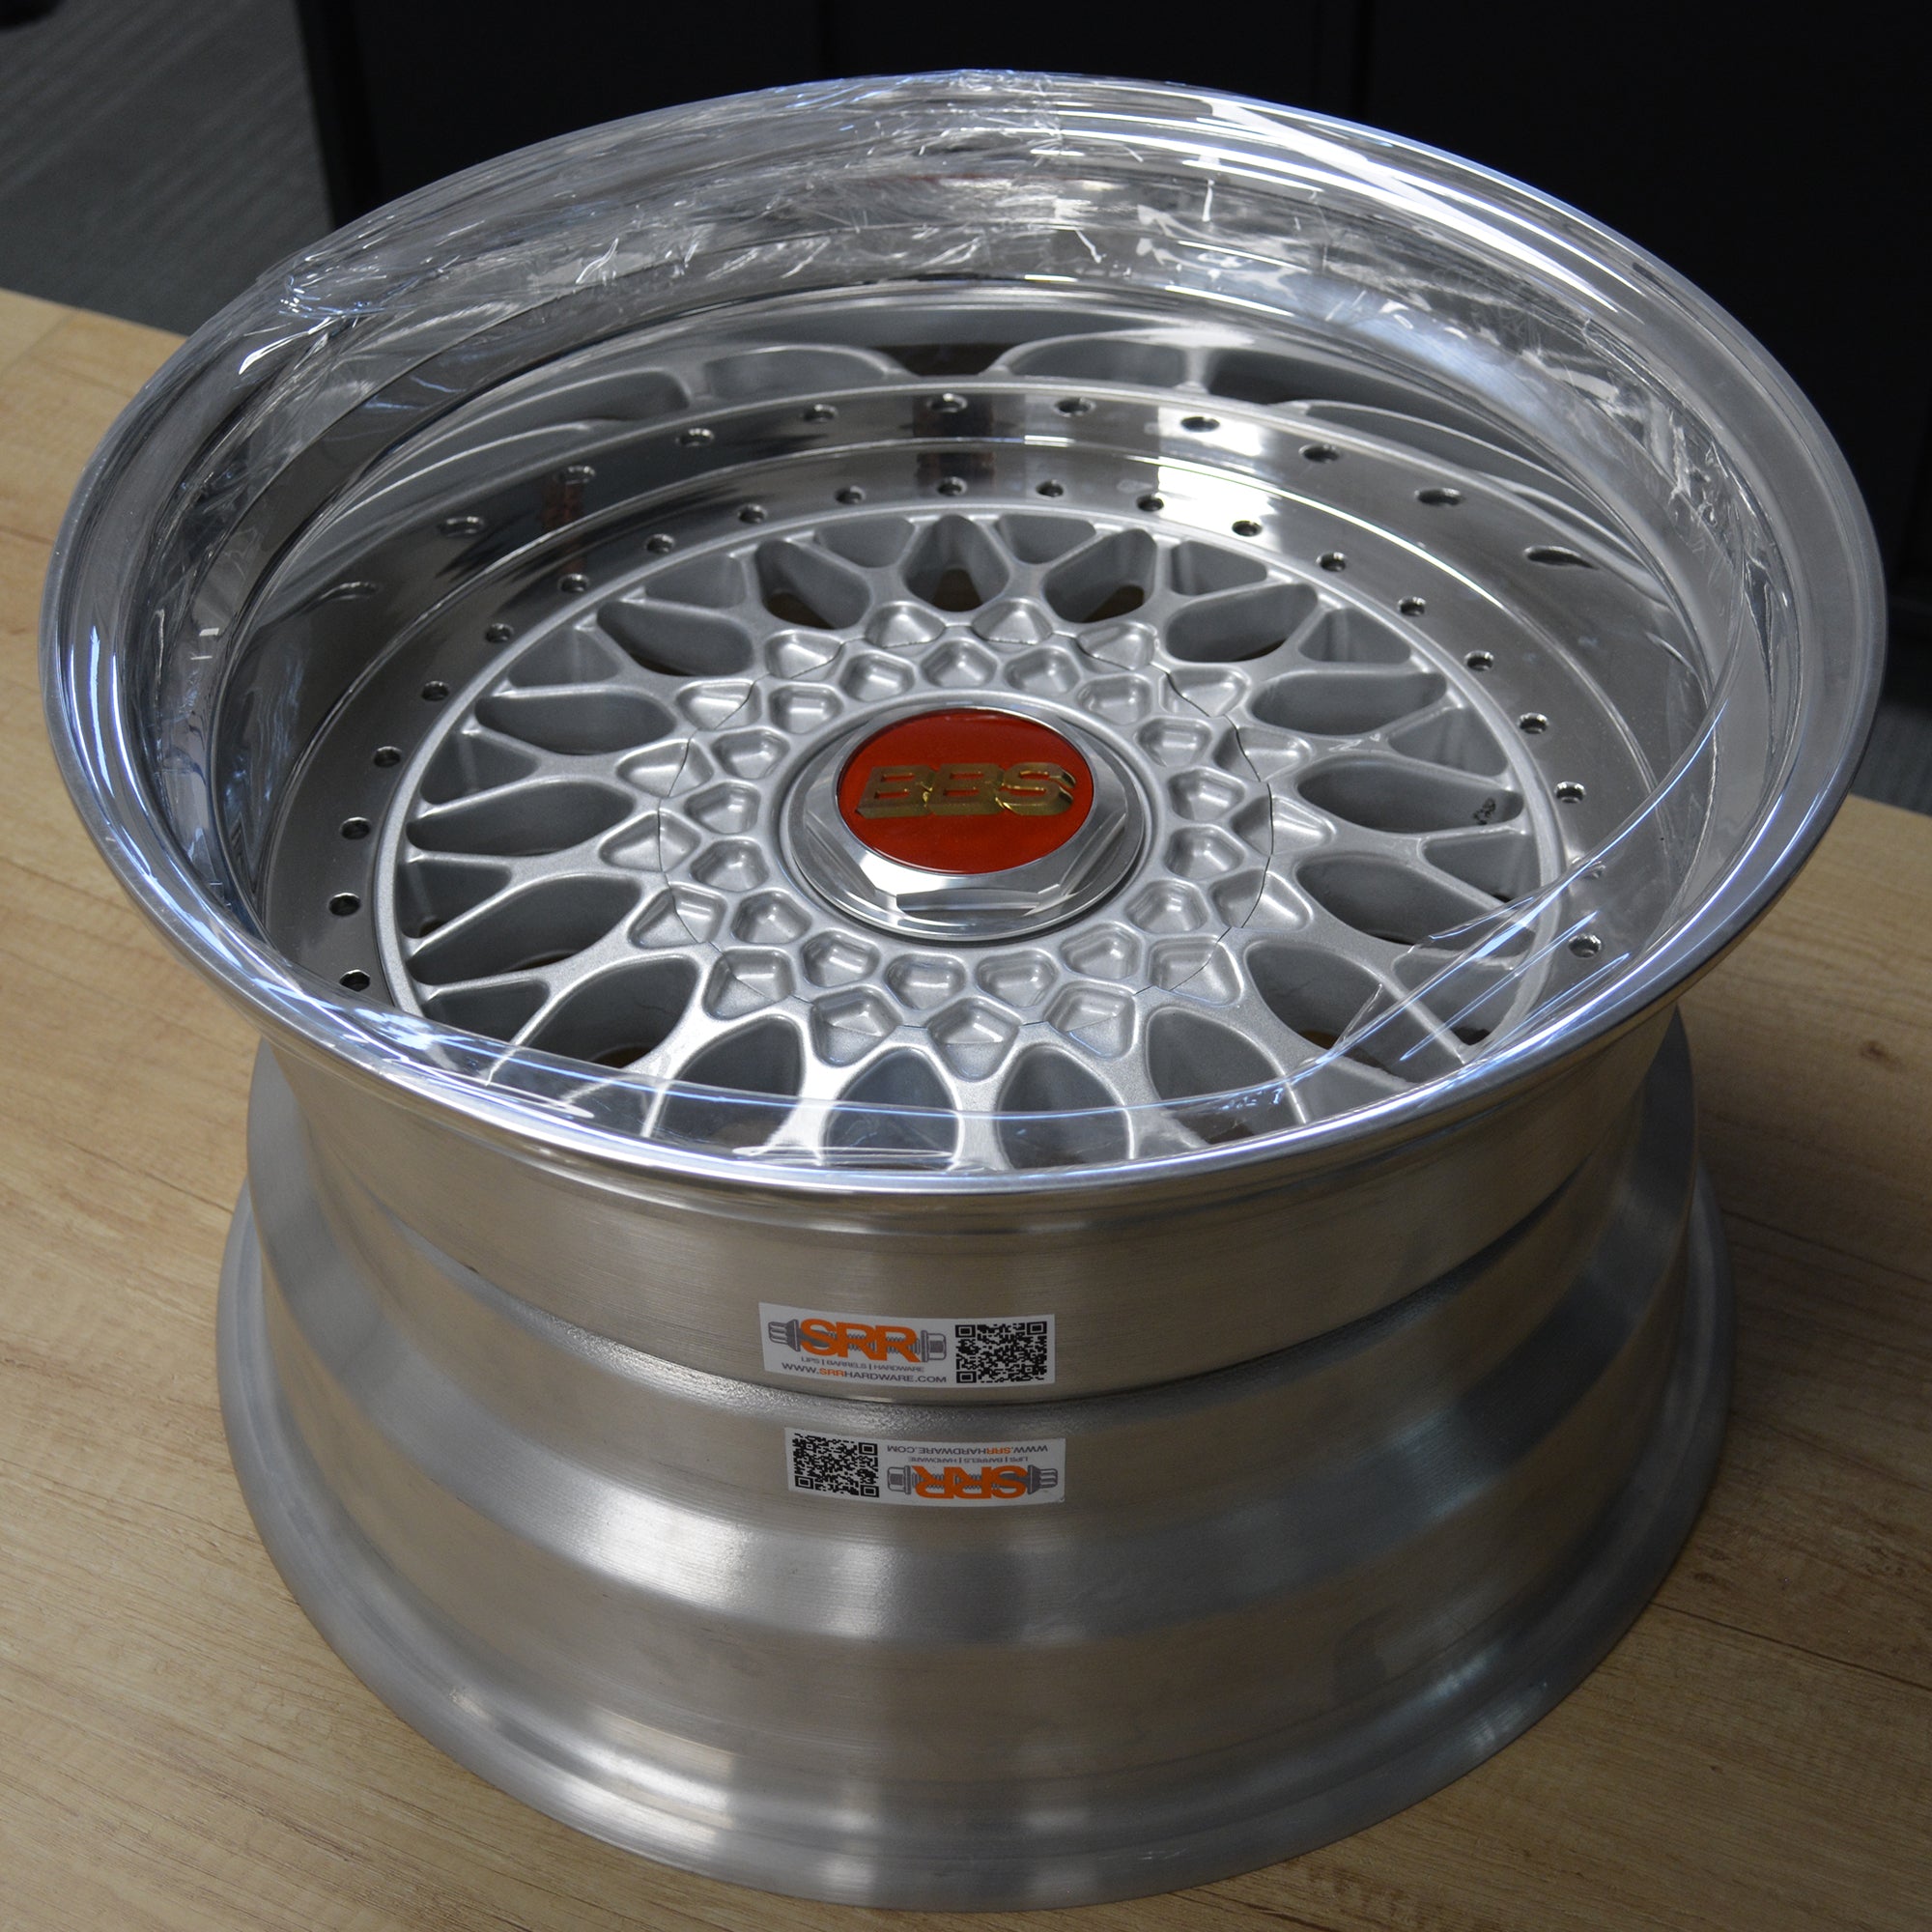
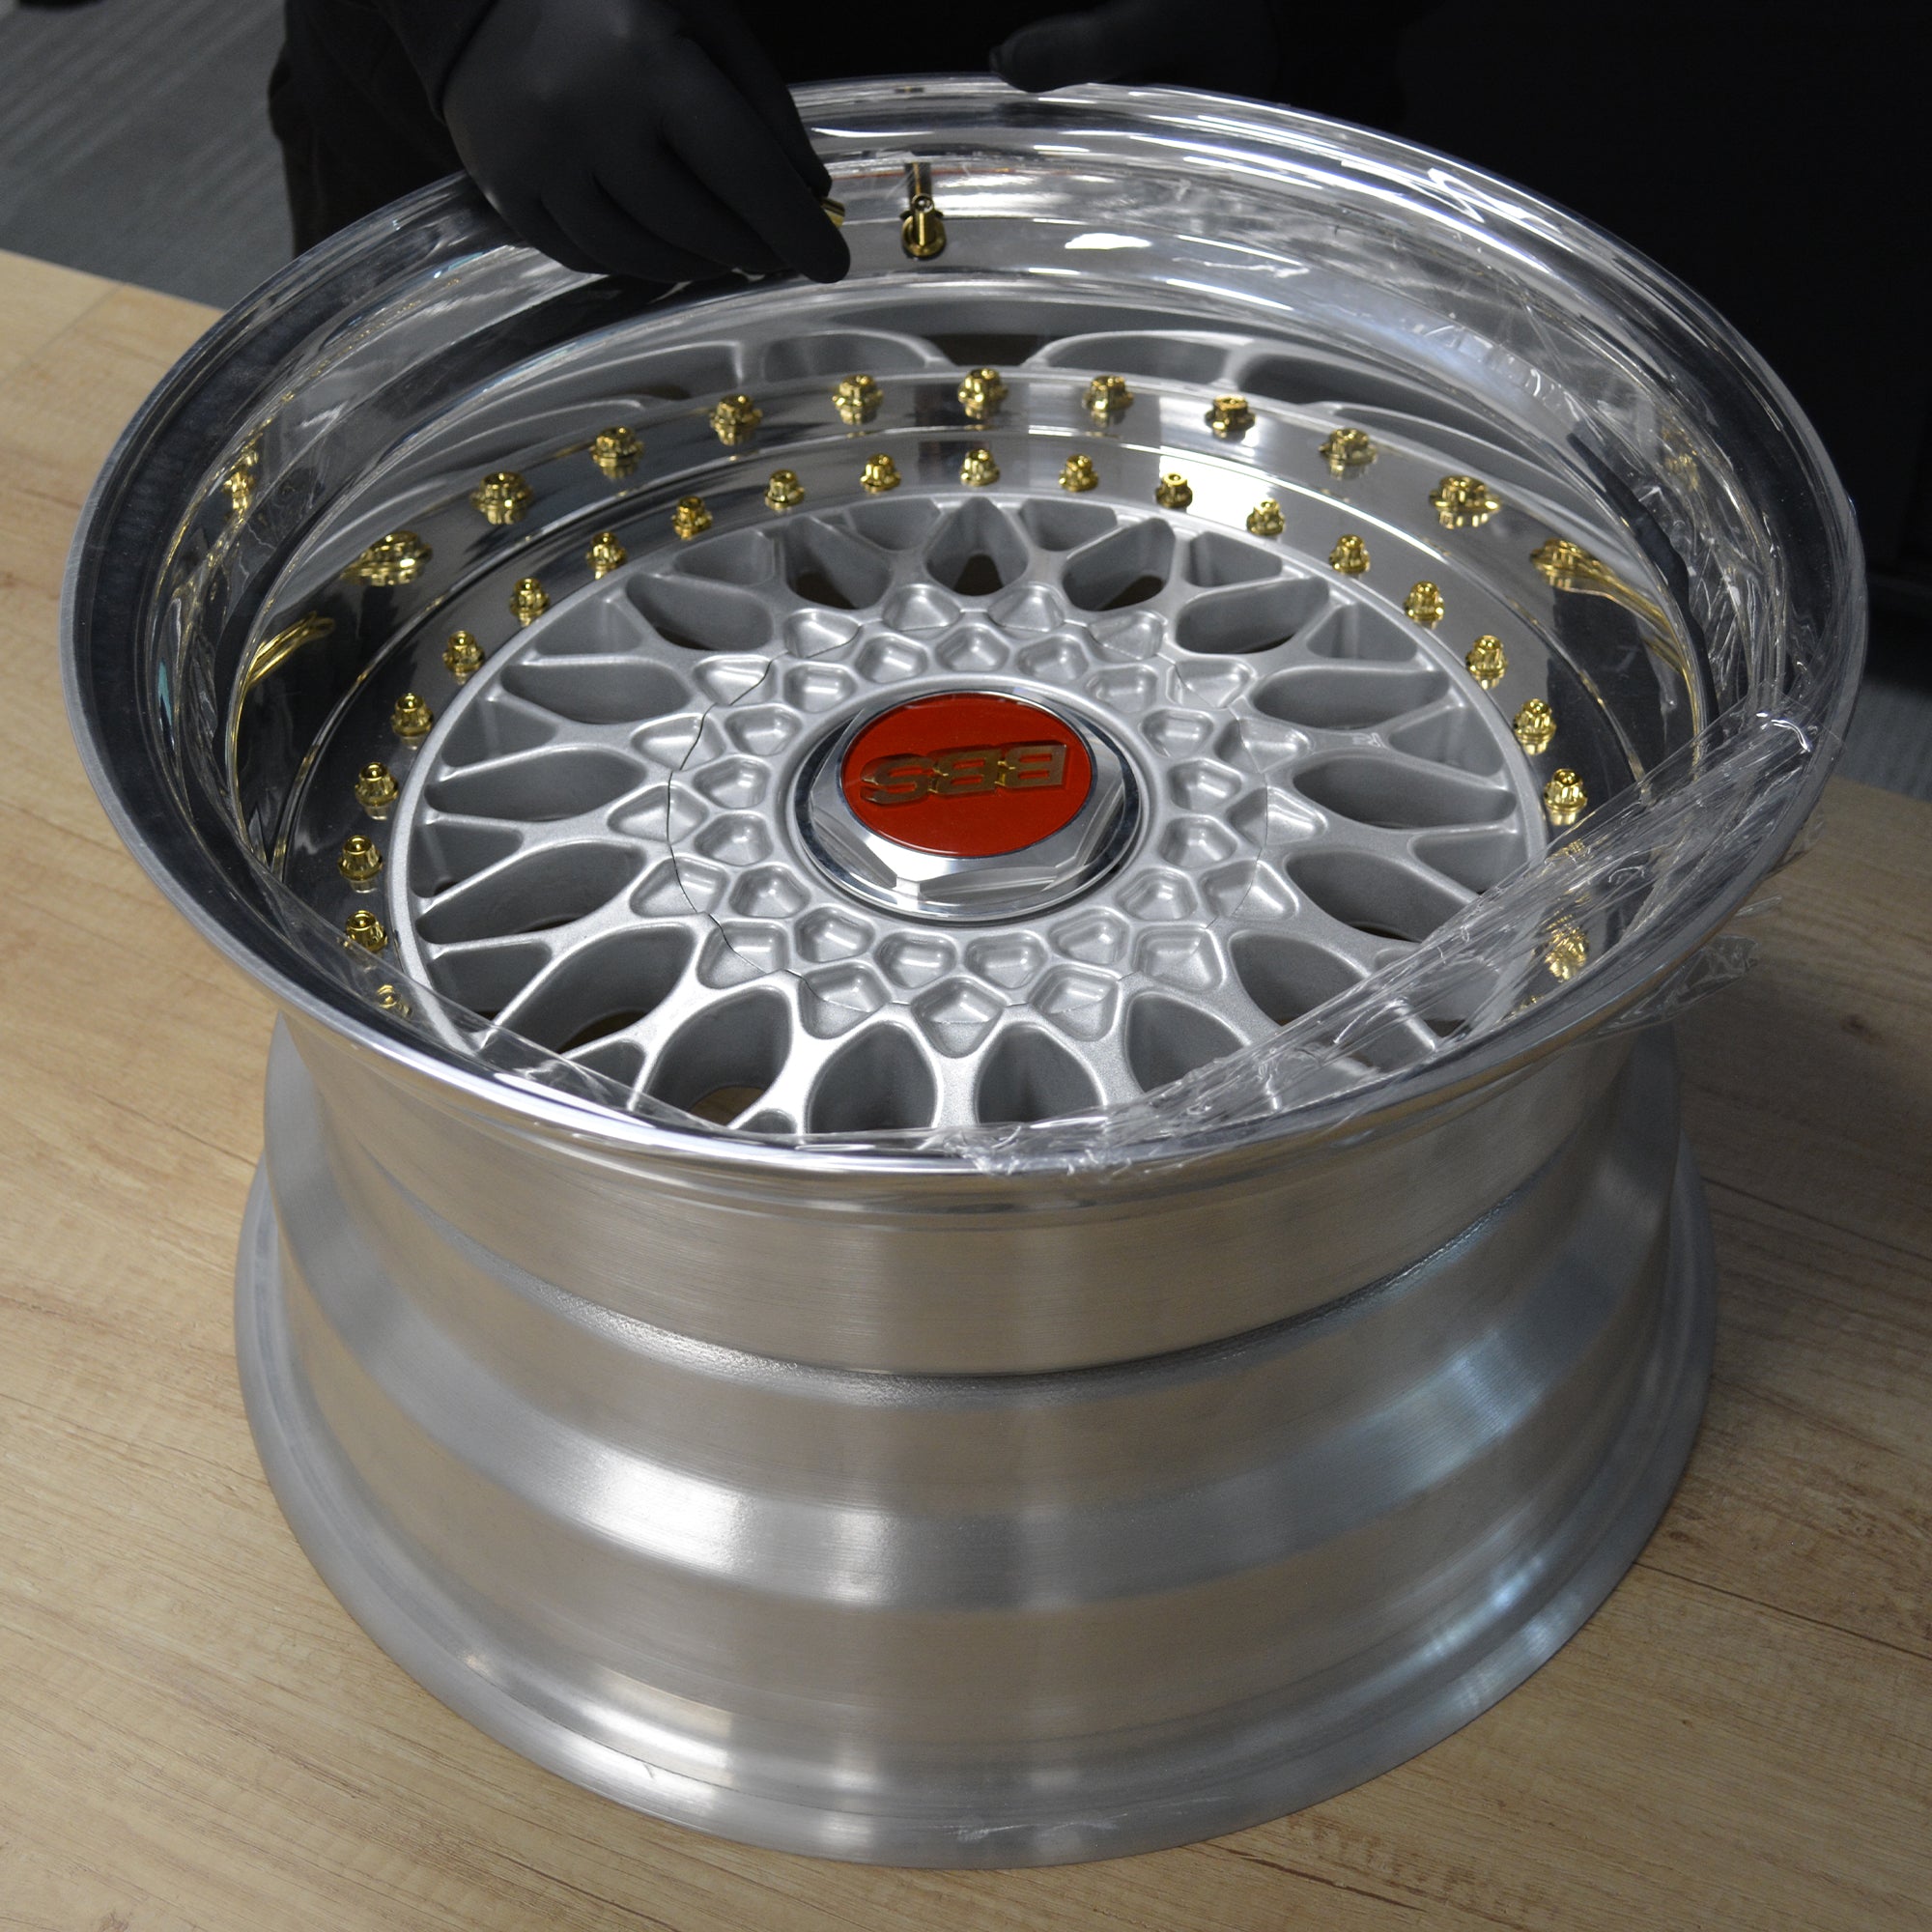
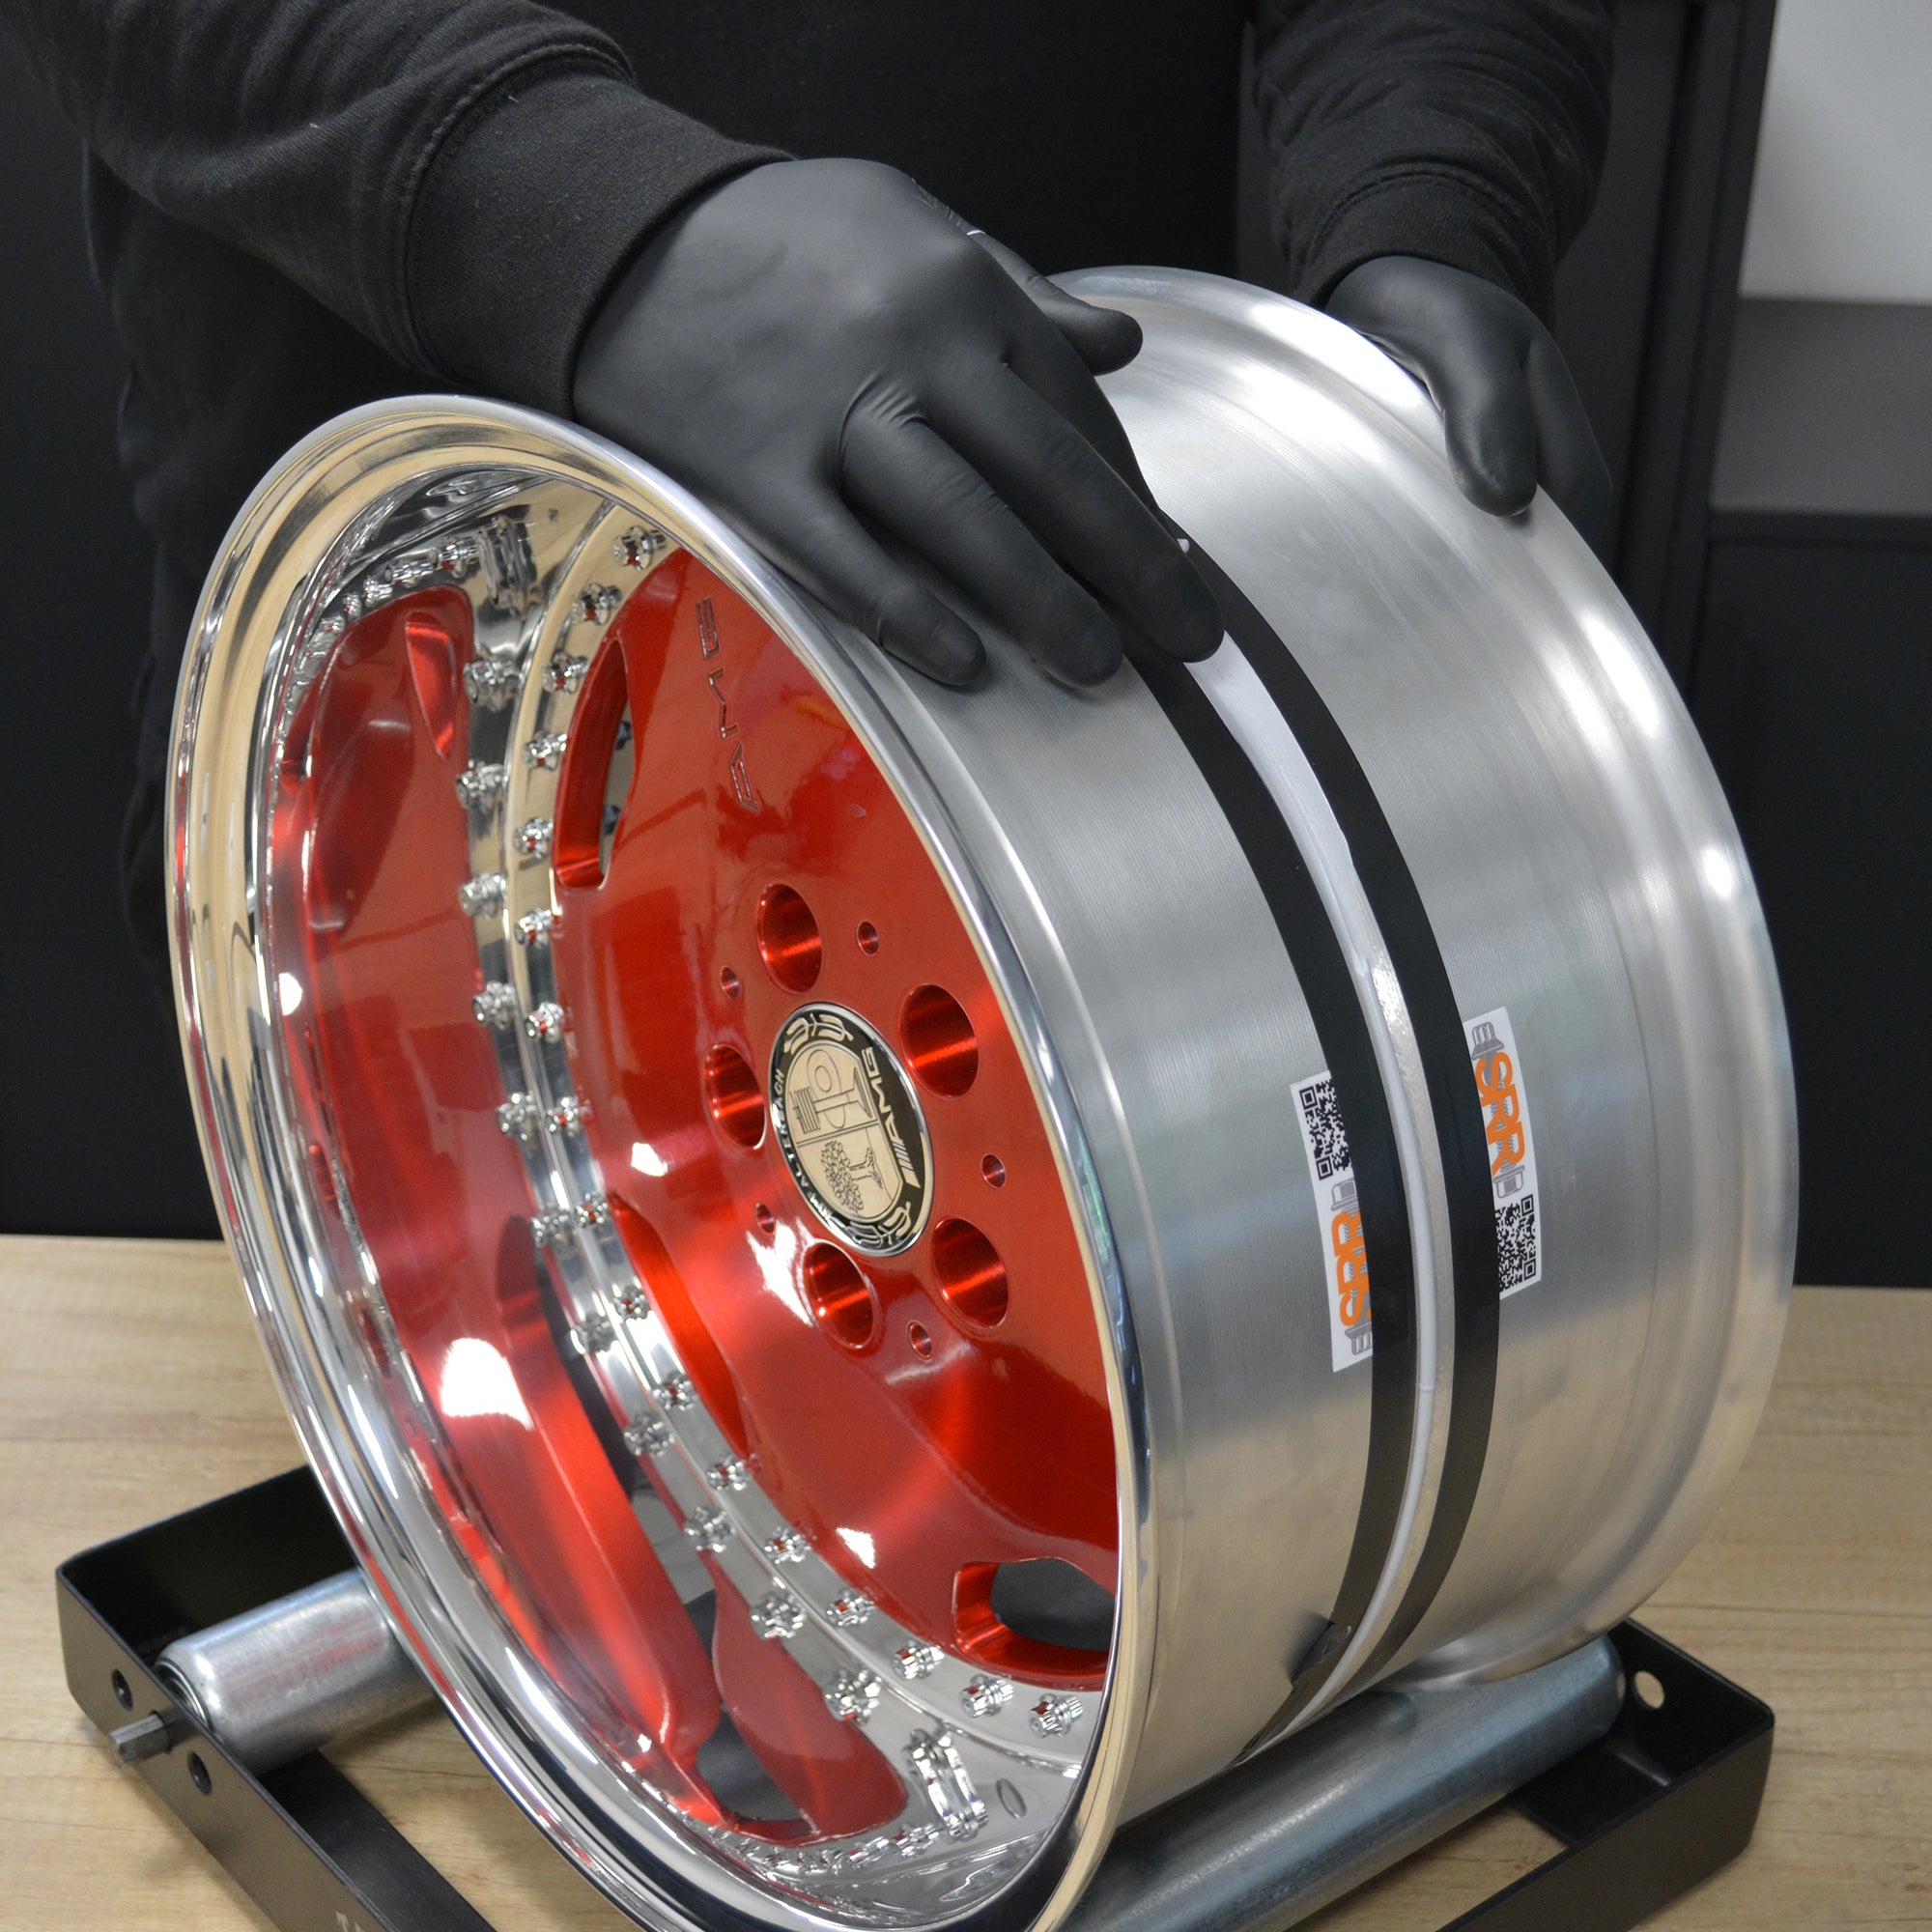
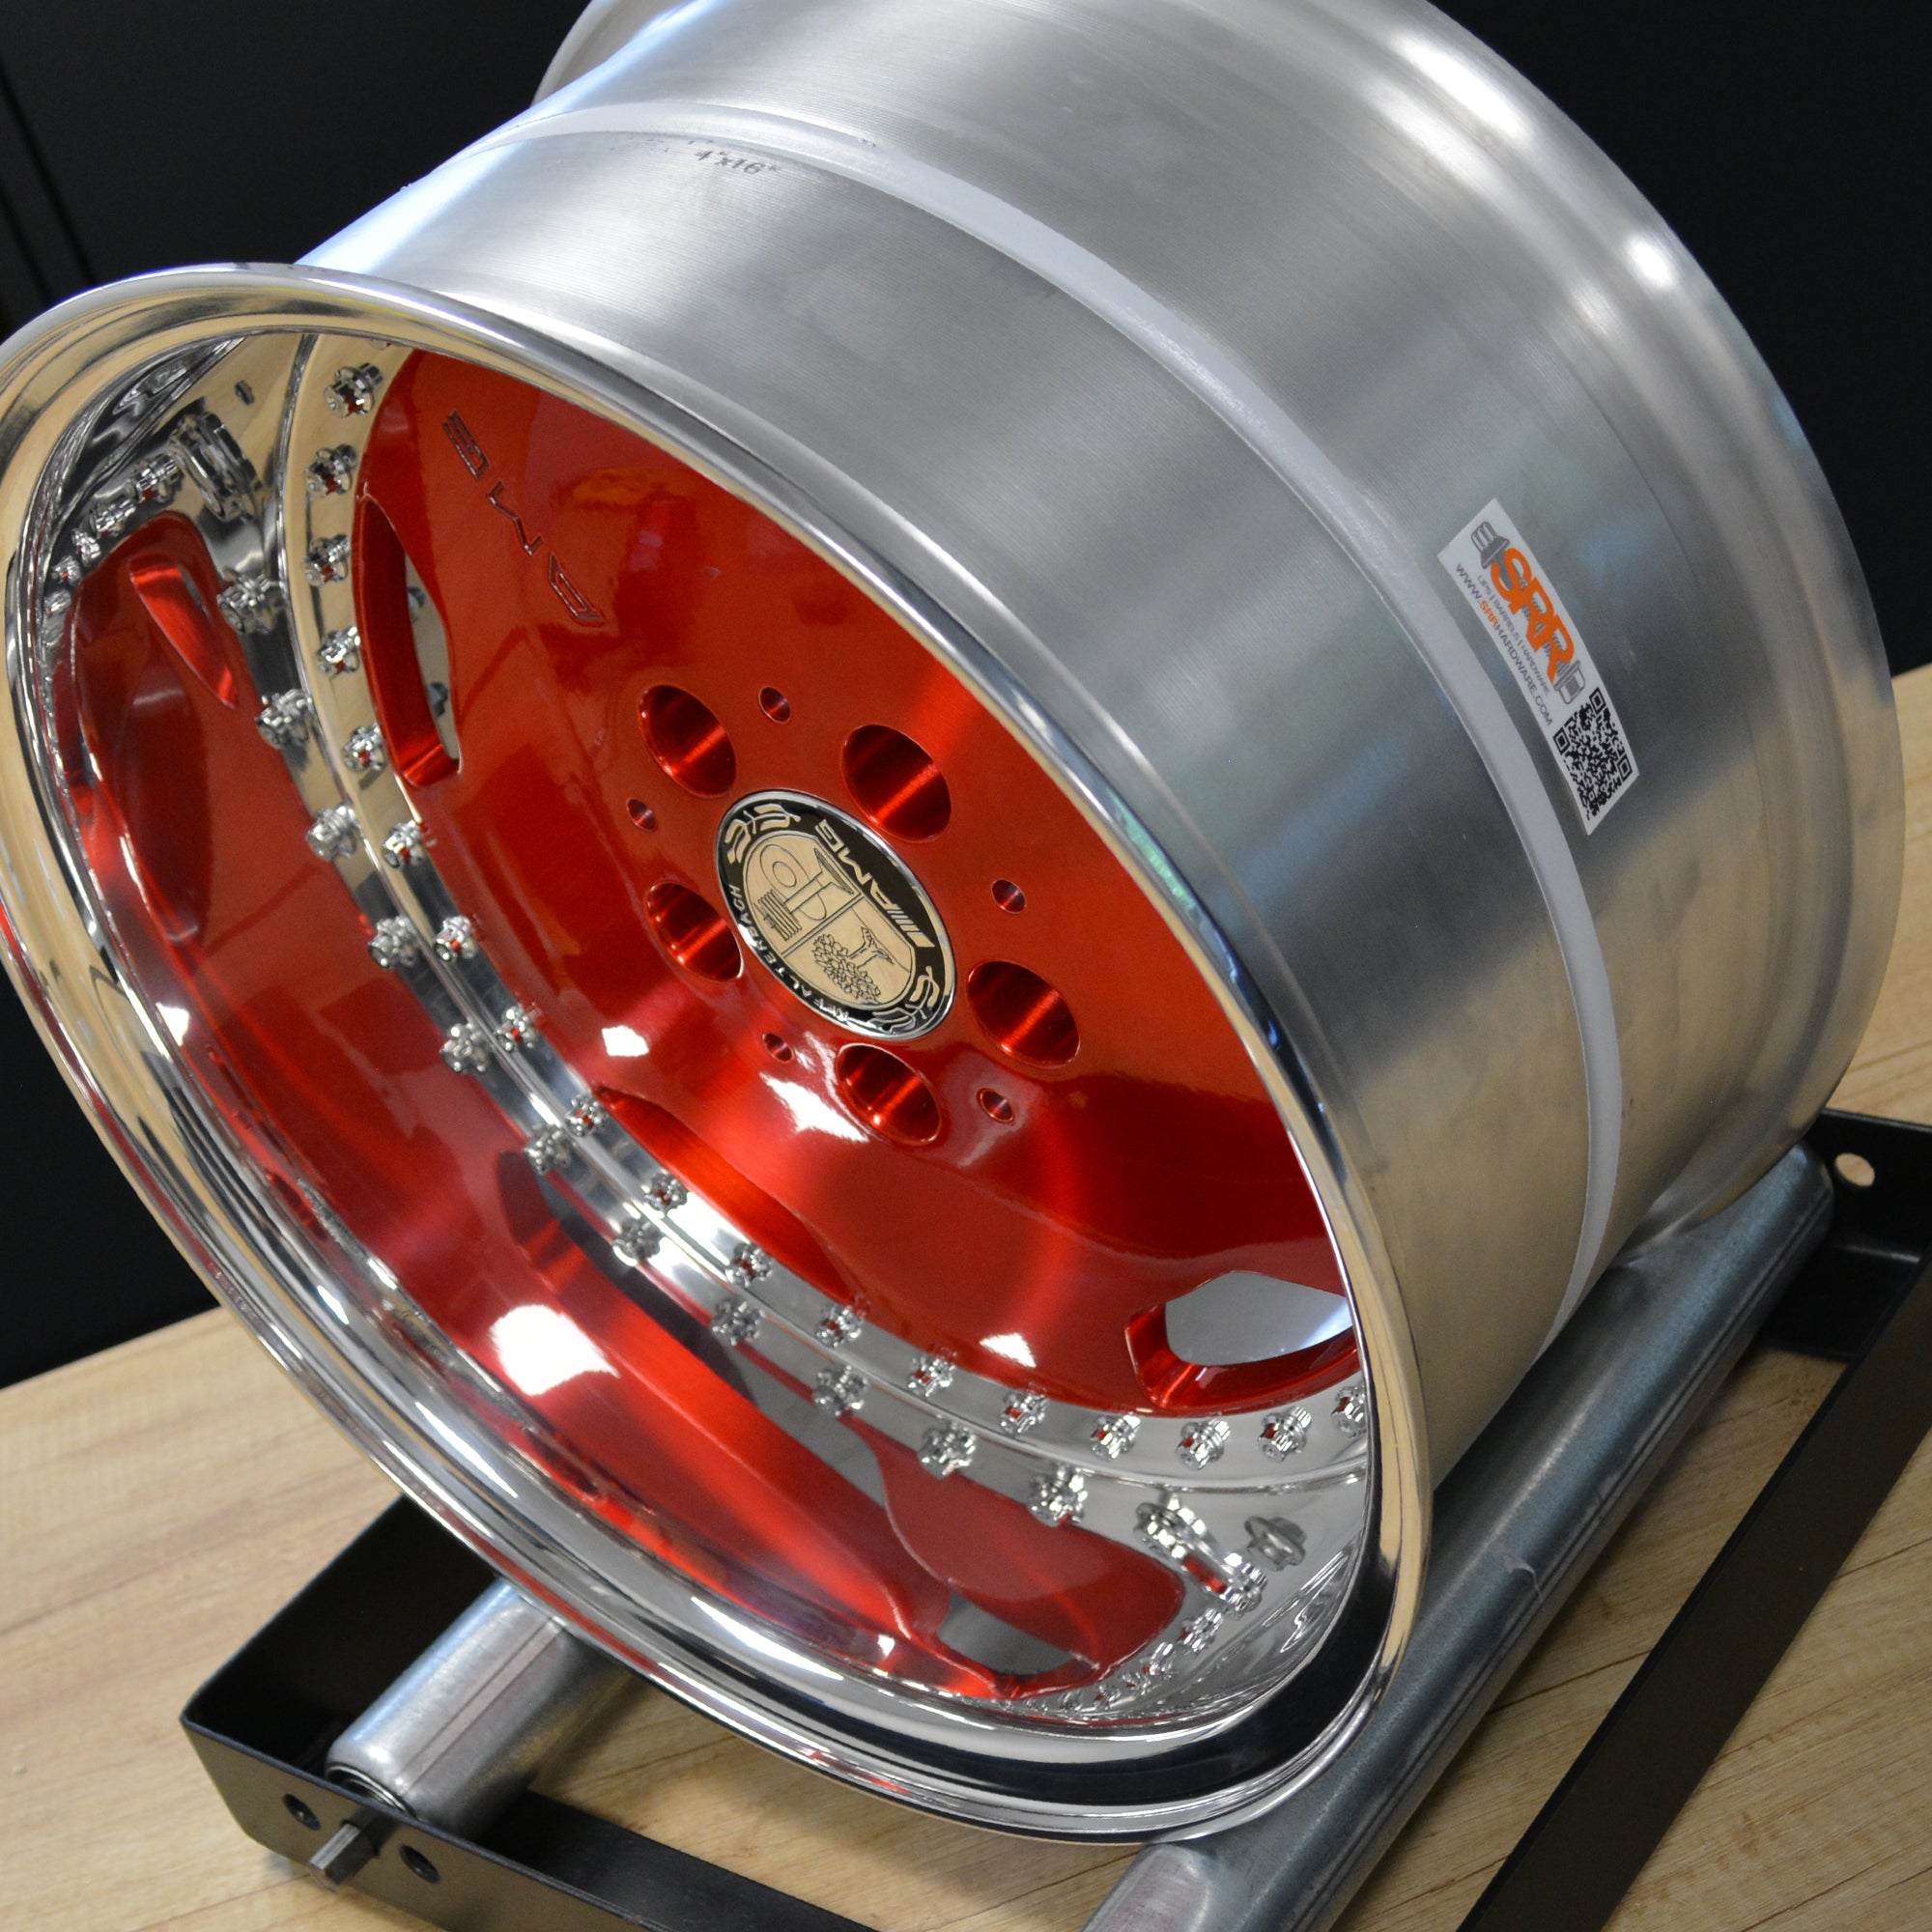
Three-piece modular wheels are typically made up of three main components: the center disc, the inner barrel, and the outer lip.
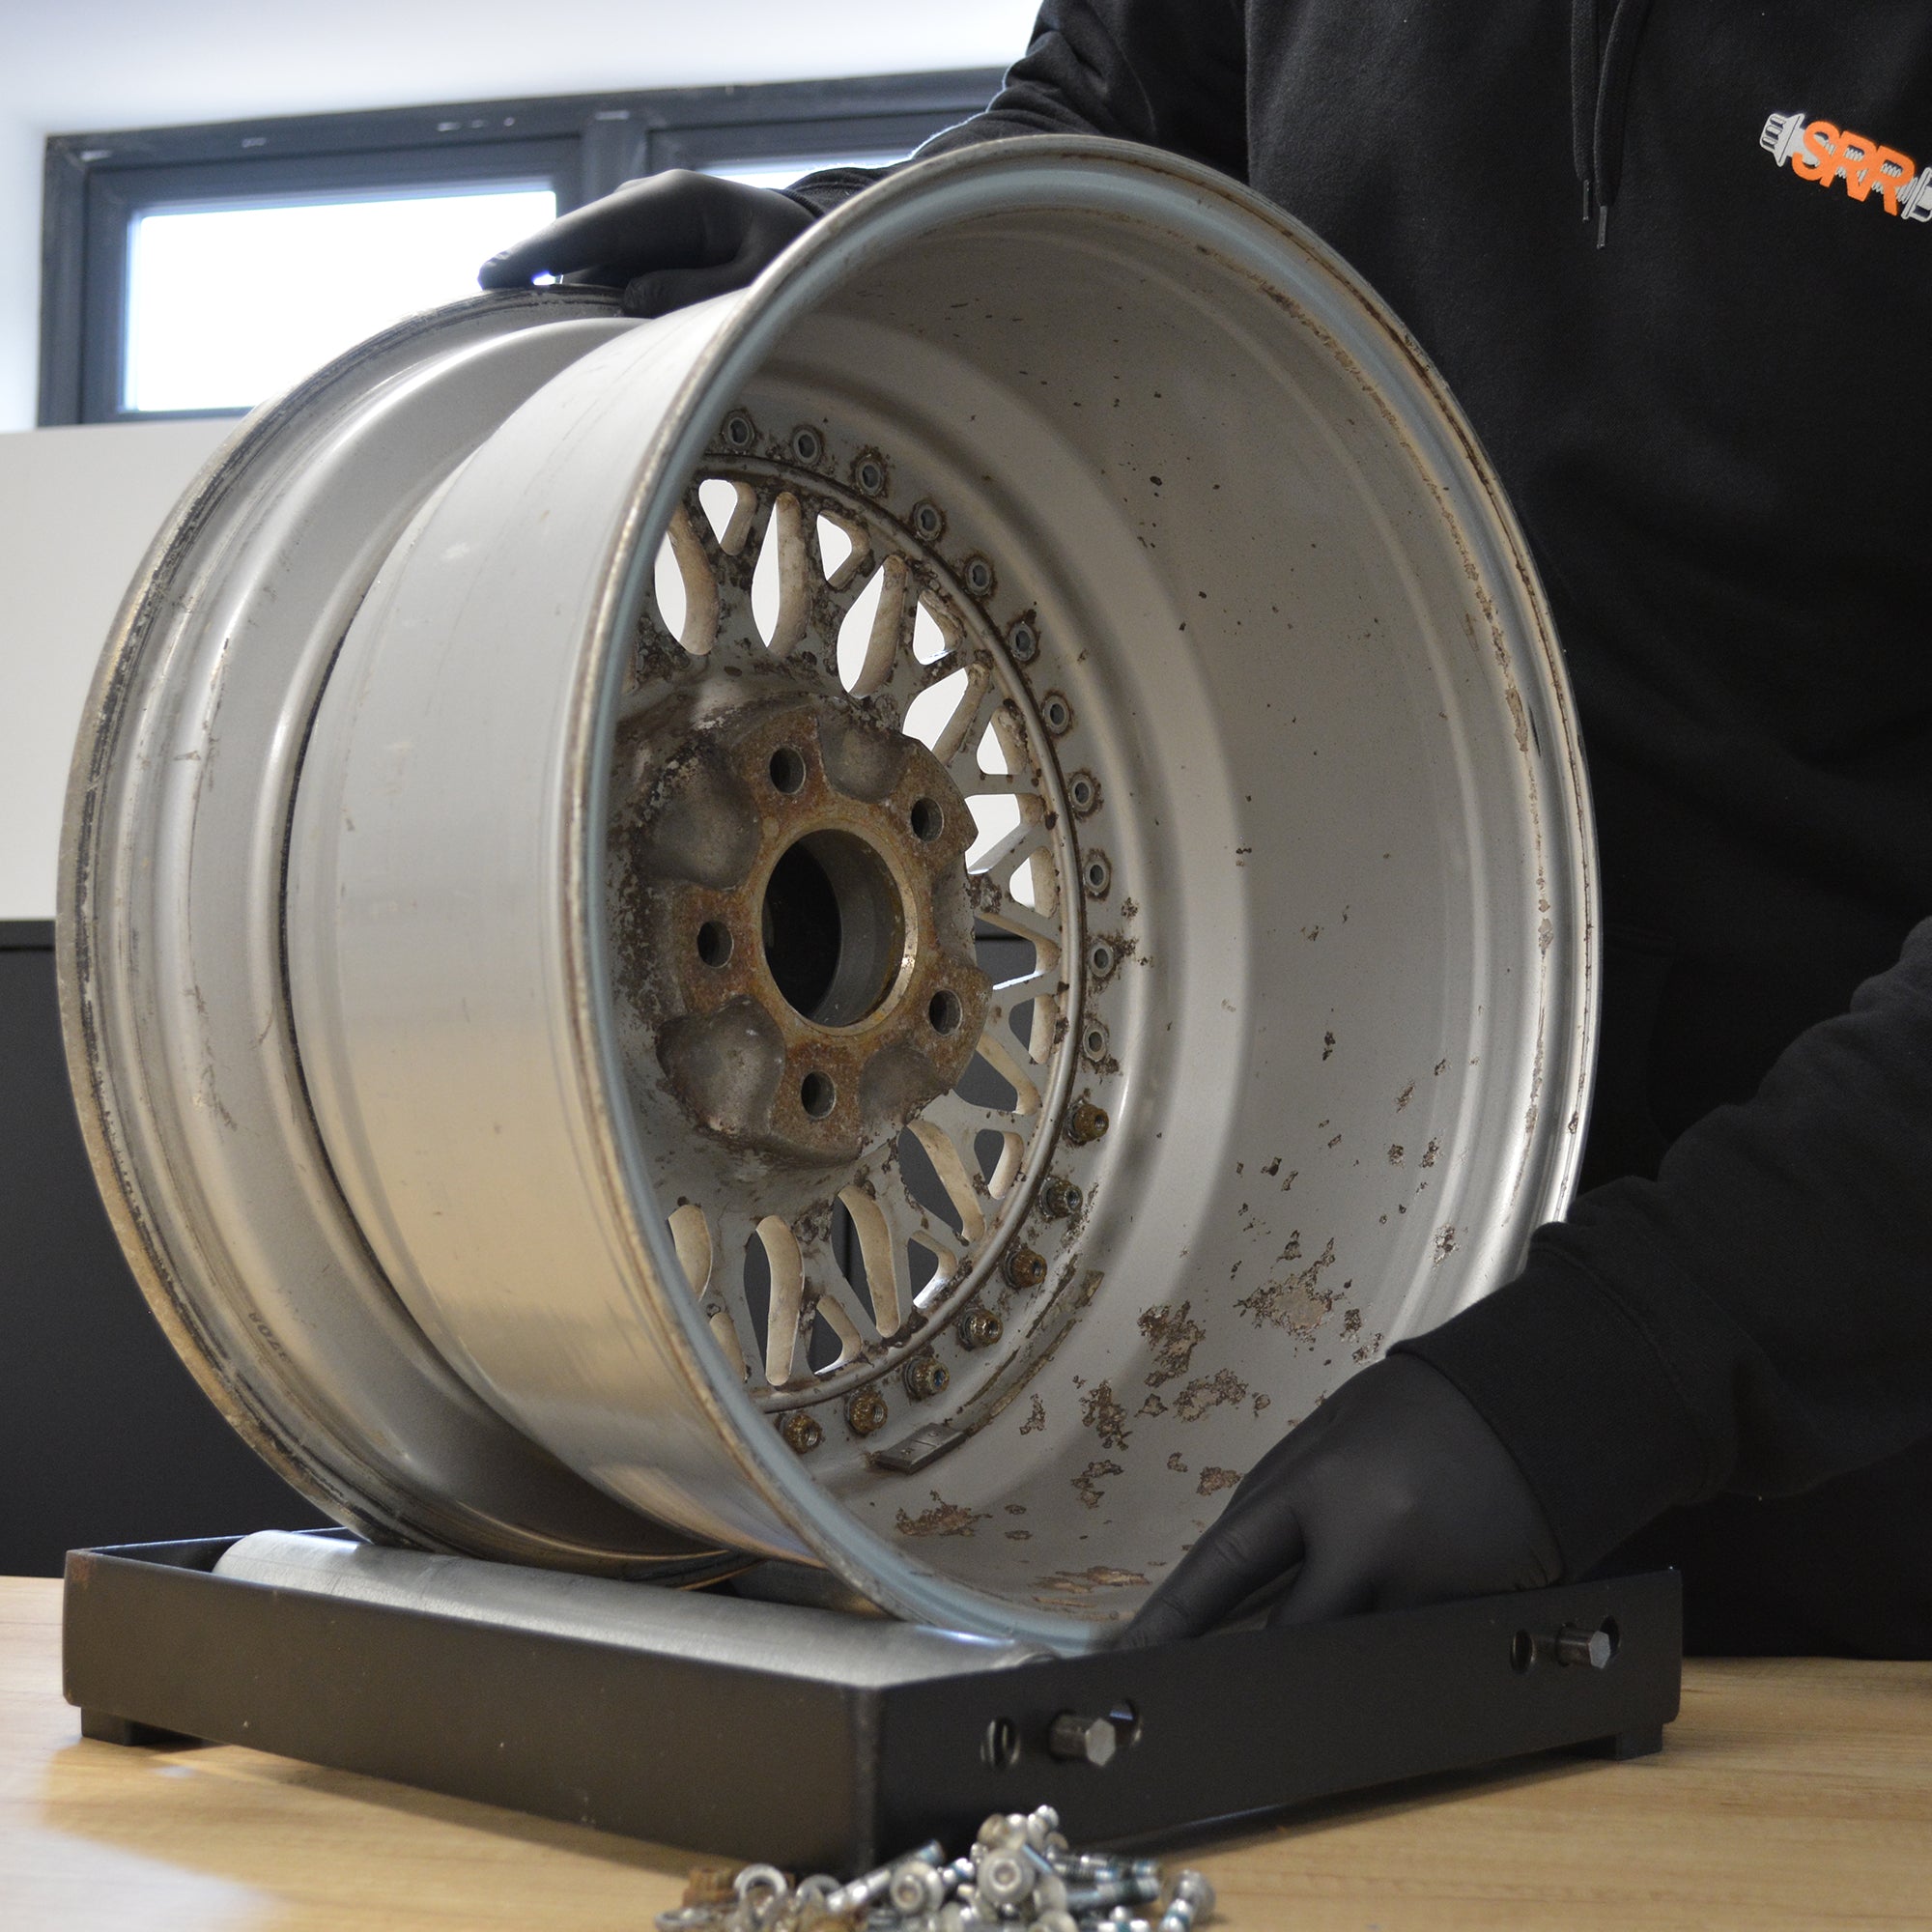
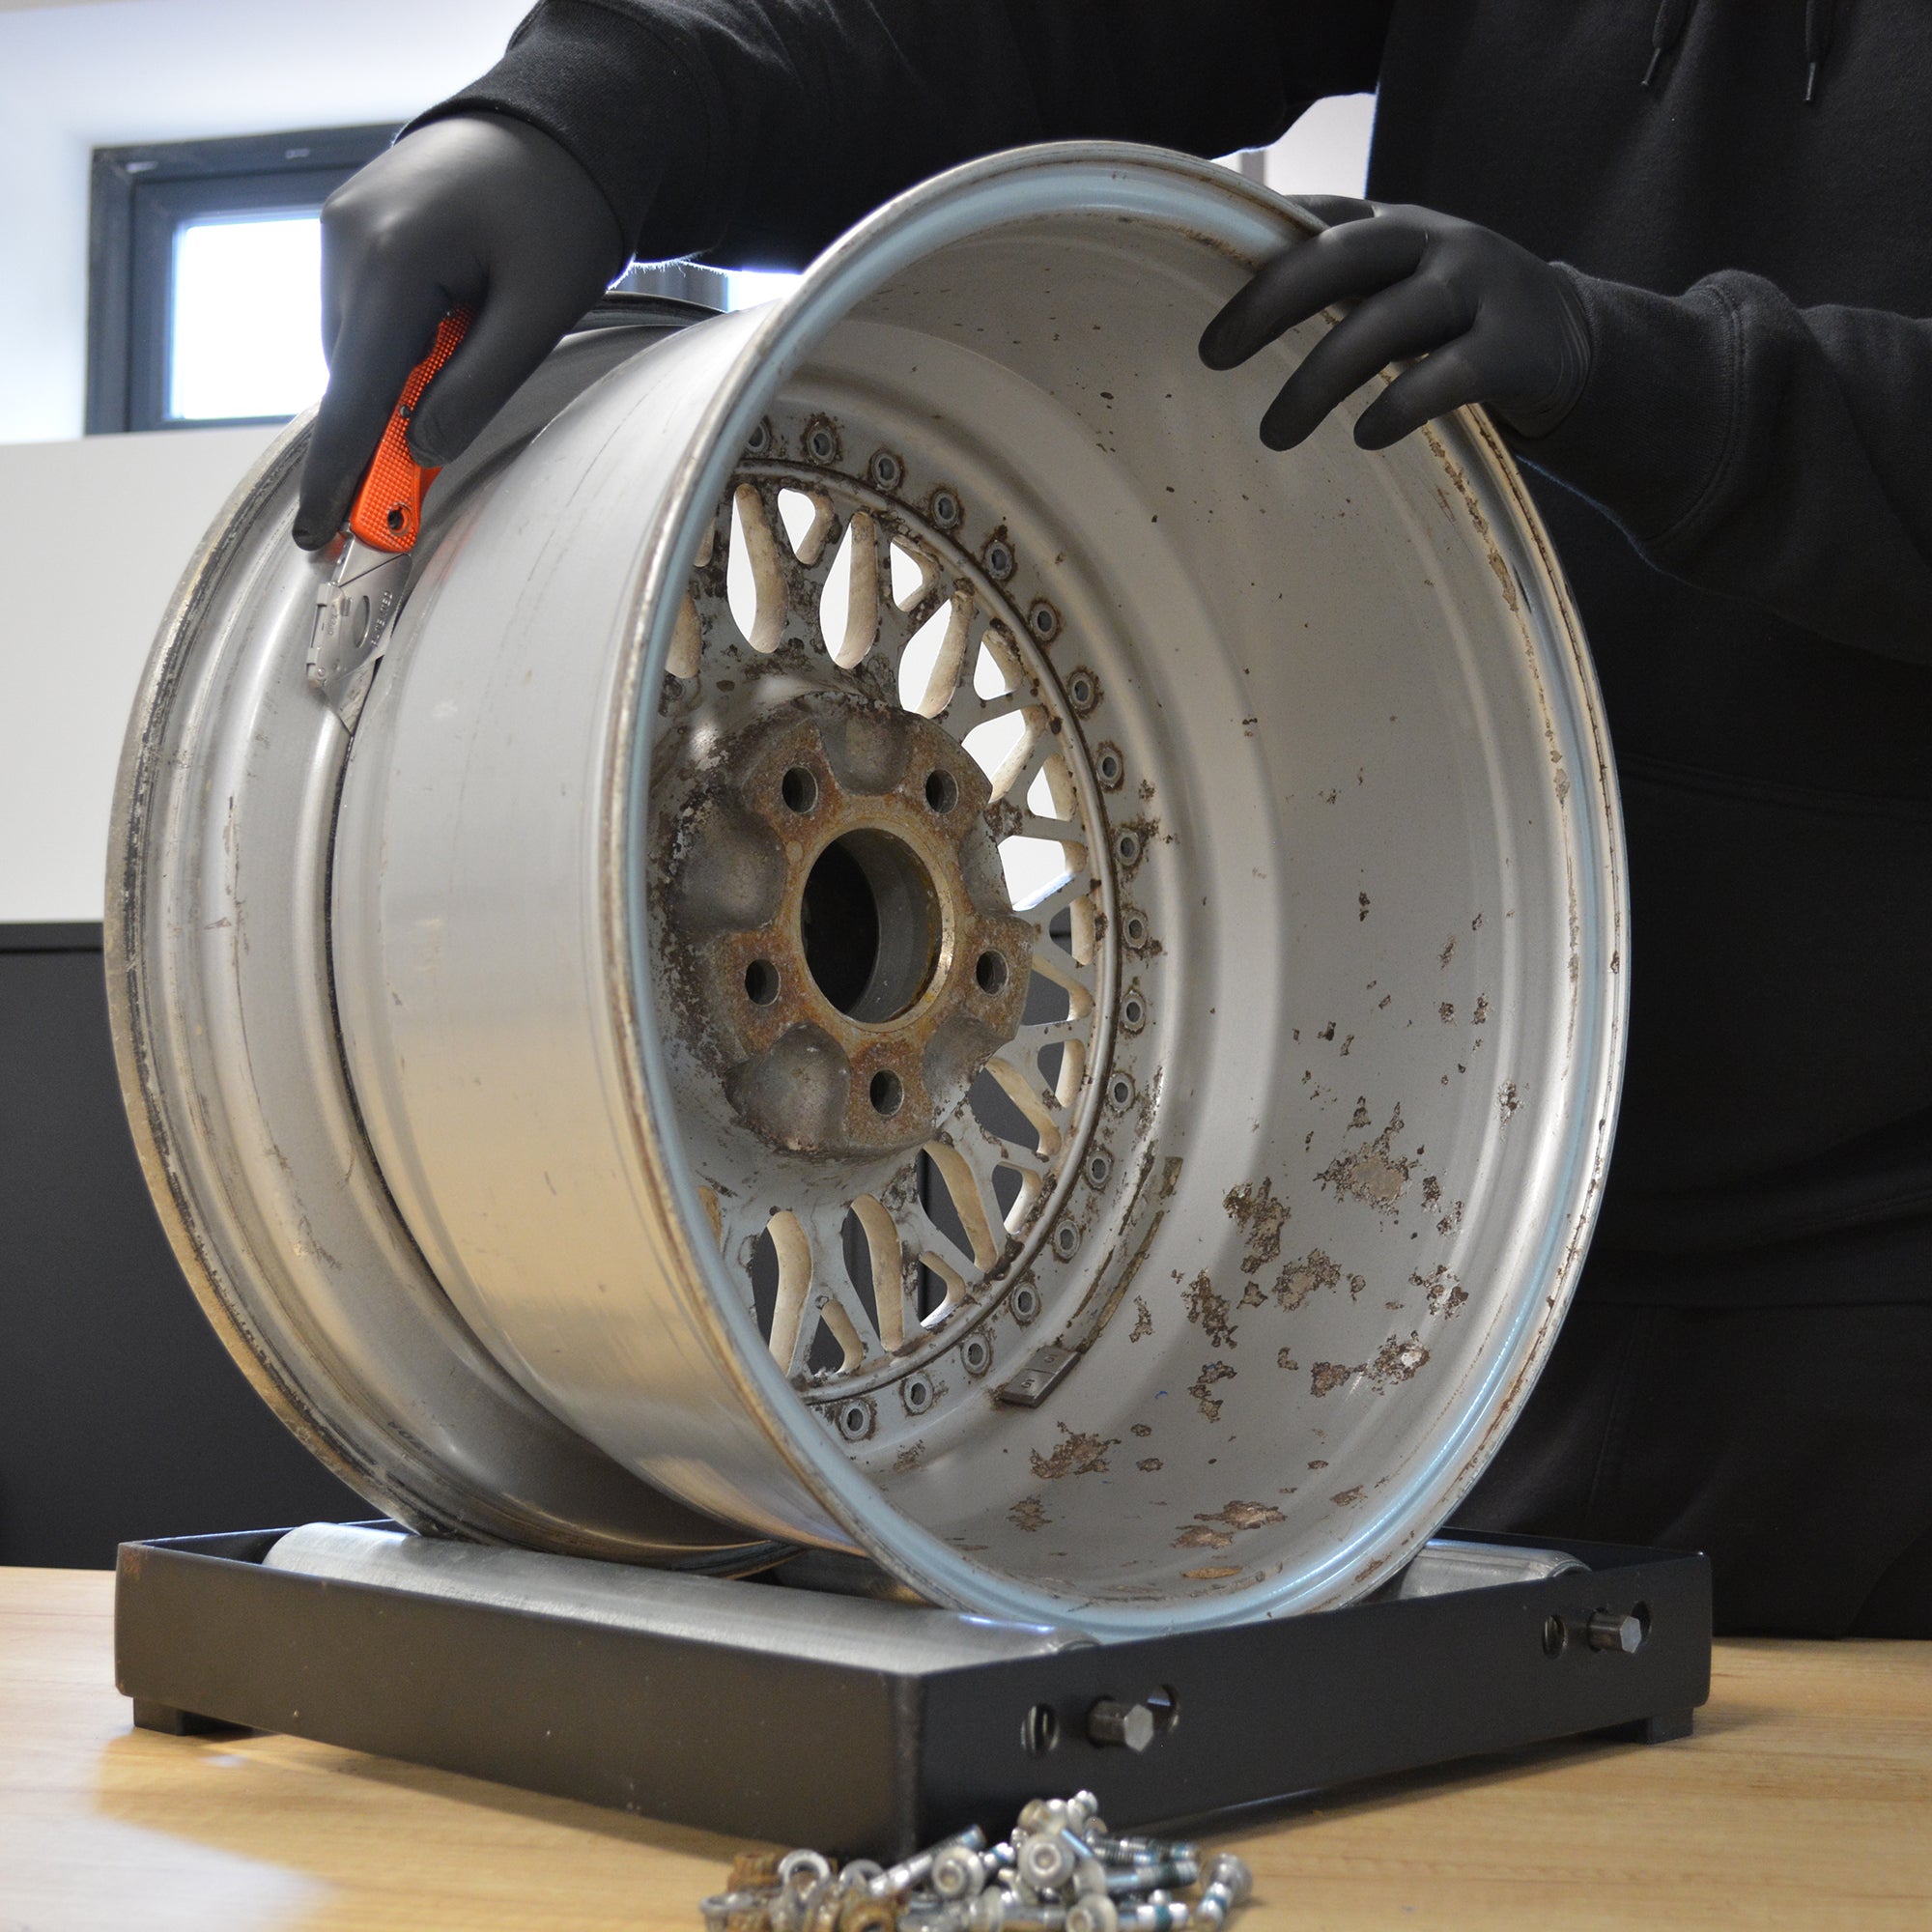
"Splitting" in this context may mean separating or taking apart these components, often for maintenance, customization, or repair purposes. It can also refer to the act of disassembling the wheel to access the inner components.
Here's a breakdown of the components in a three-piece modular wheel:
"Splitting" these components is often done when someone wants to clean, repaint, or customize their wheels, or if there is a need for repair or replacement of any of the parts. It can also be part of the process when changing the offset or width of the wheel to better fit a specific vehicle or achieve a particular look.
However, it's essential to have the necessary tools, skills, and knowledge to safely and properly disassemble, modify, and reassemble three-piece modular wheels to ensure the structural integrity and safety of the wheel when it's back on the vehicle. If you're not experienced with this process, it's often recommended to seek professional assistance or consult with a specialist in wheel customization and maintenance.
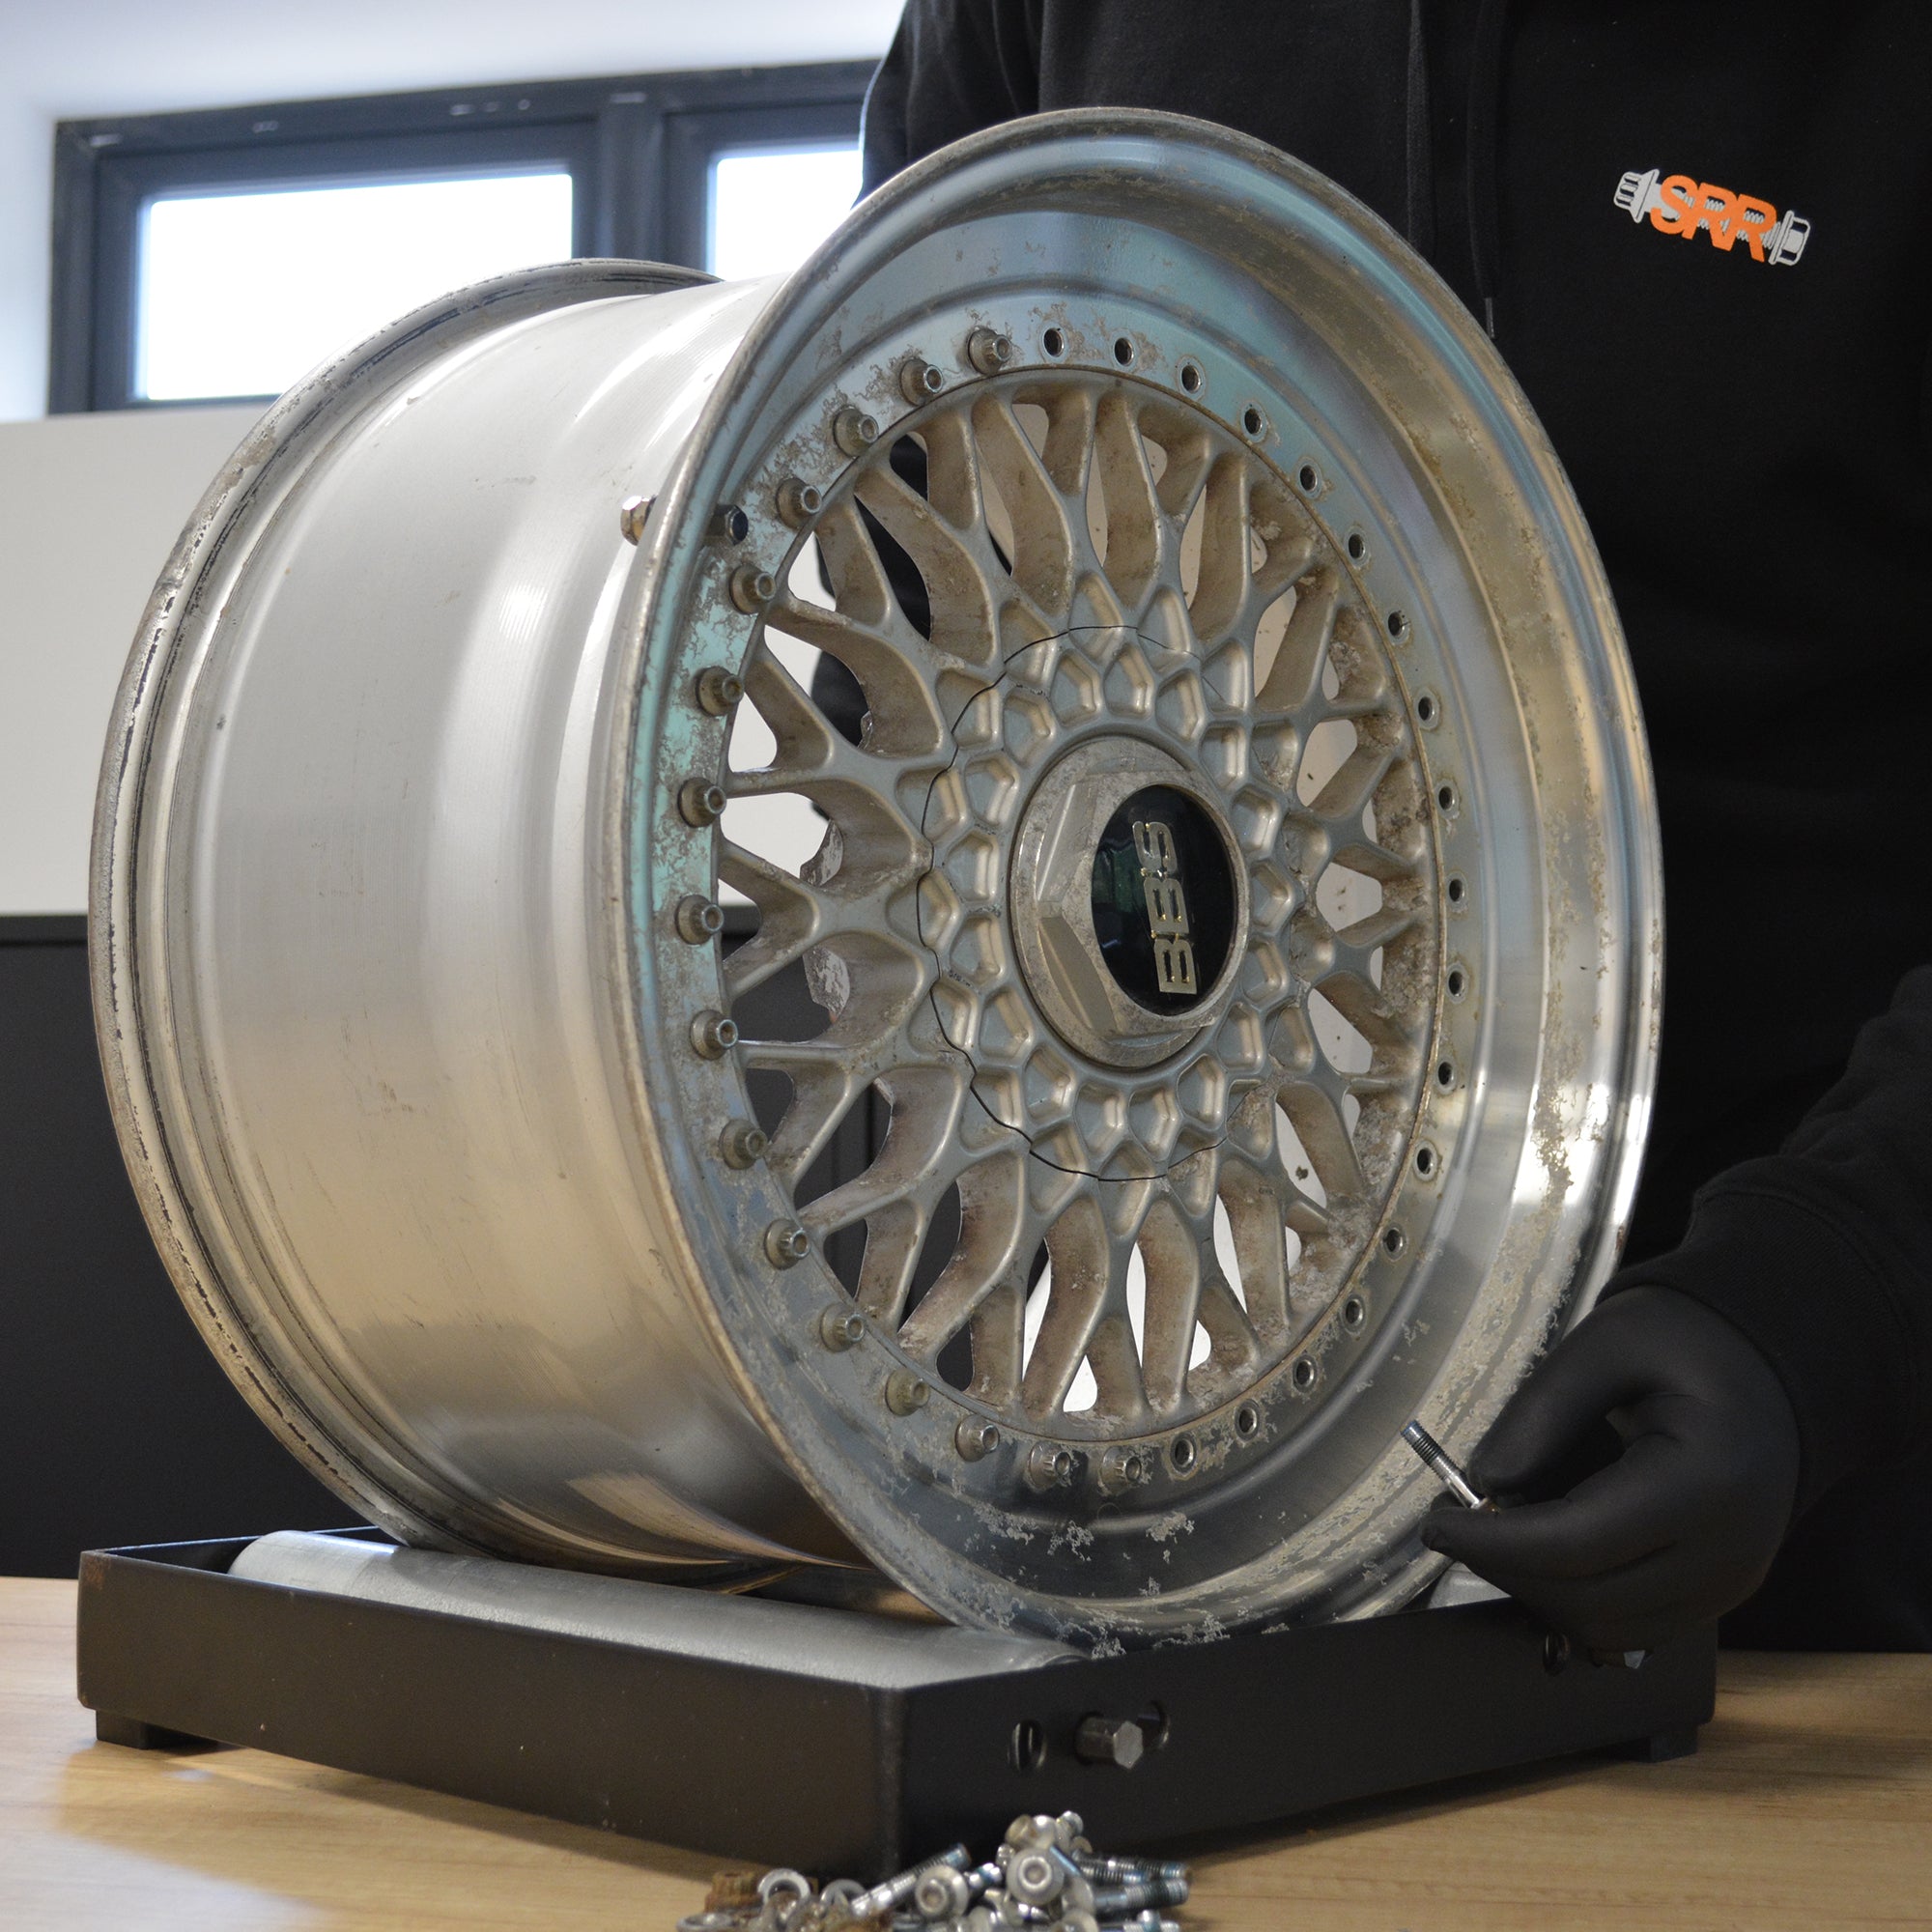
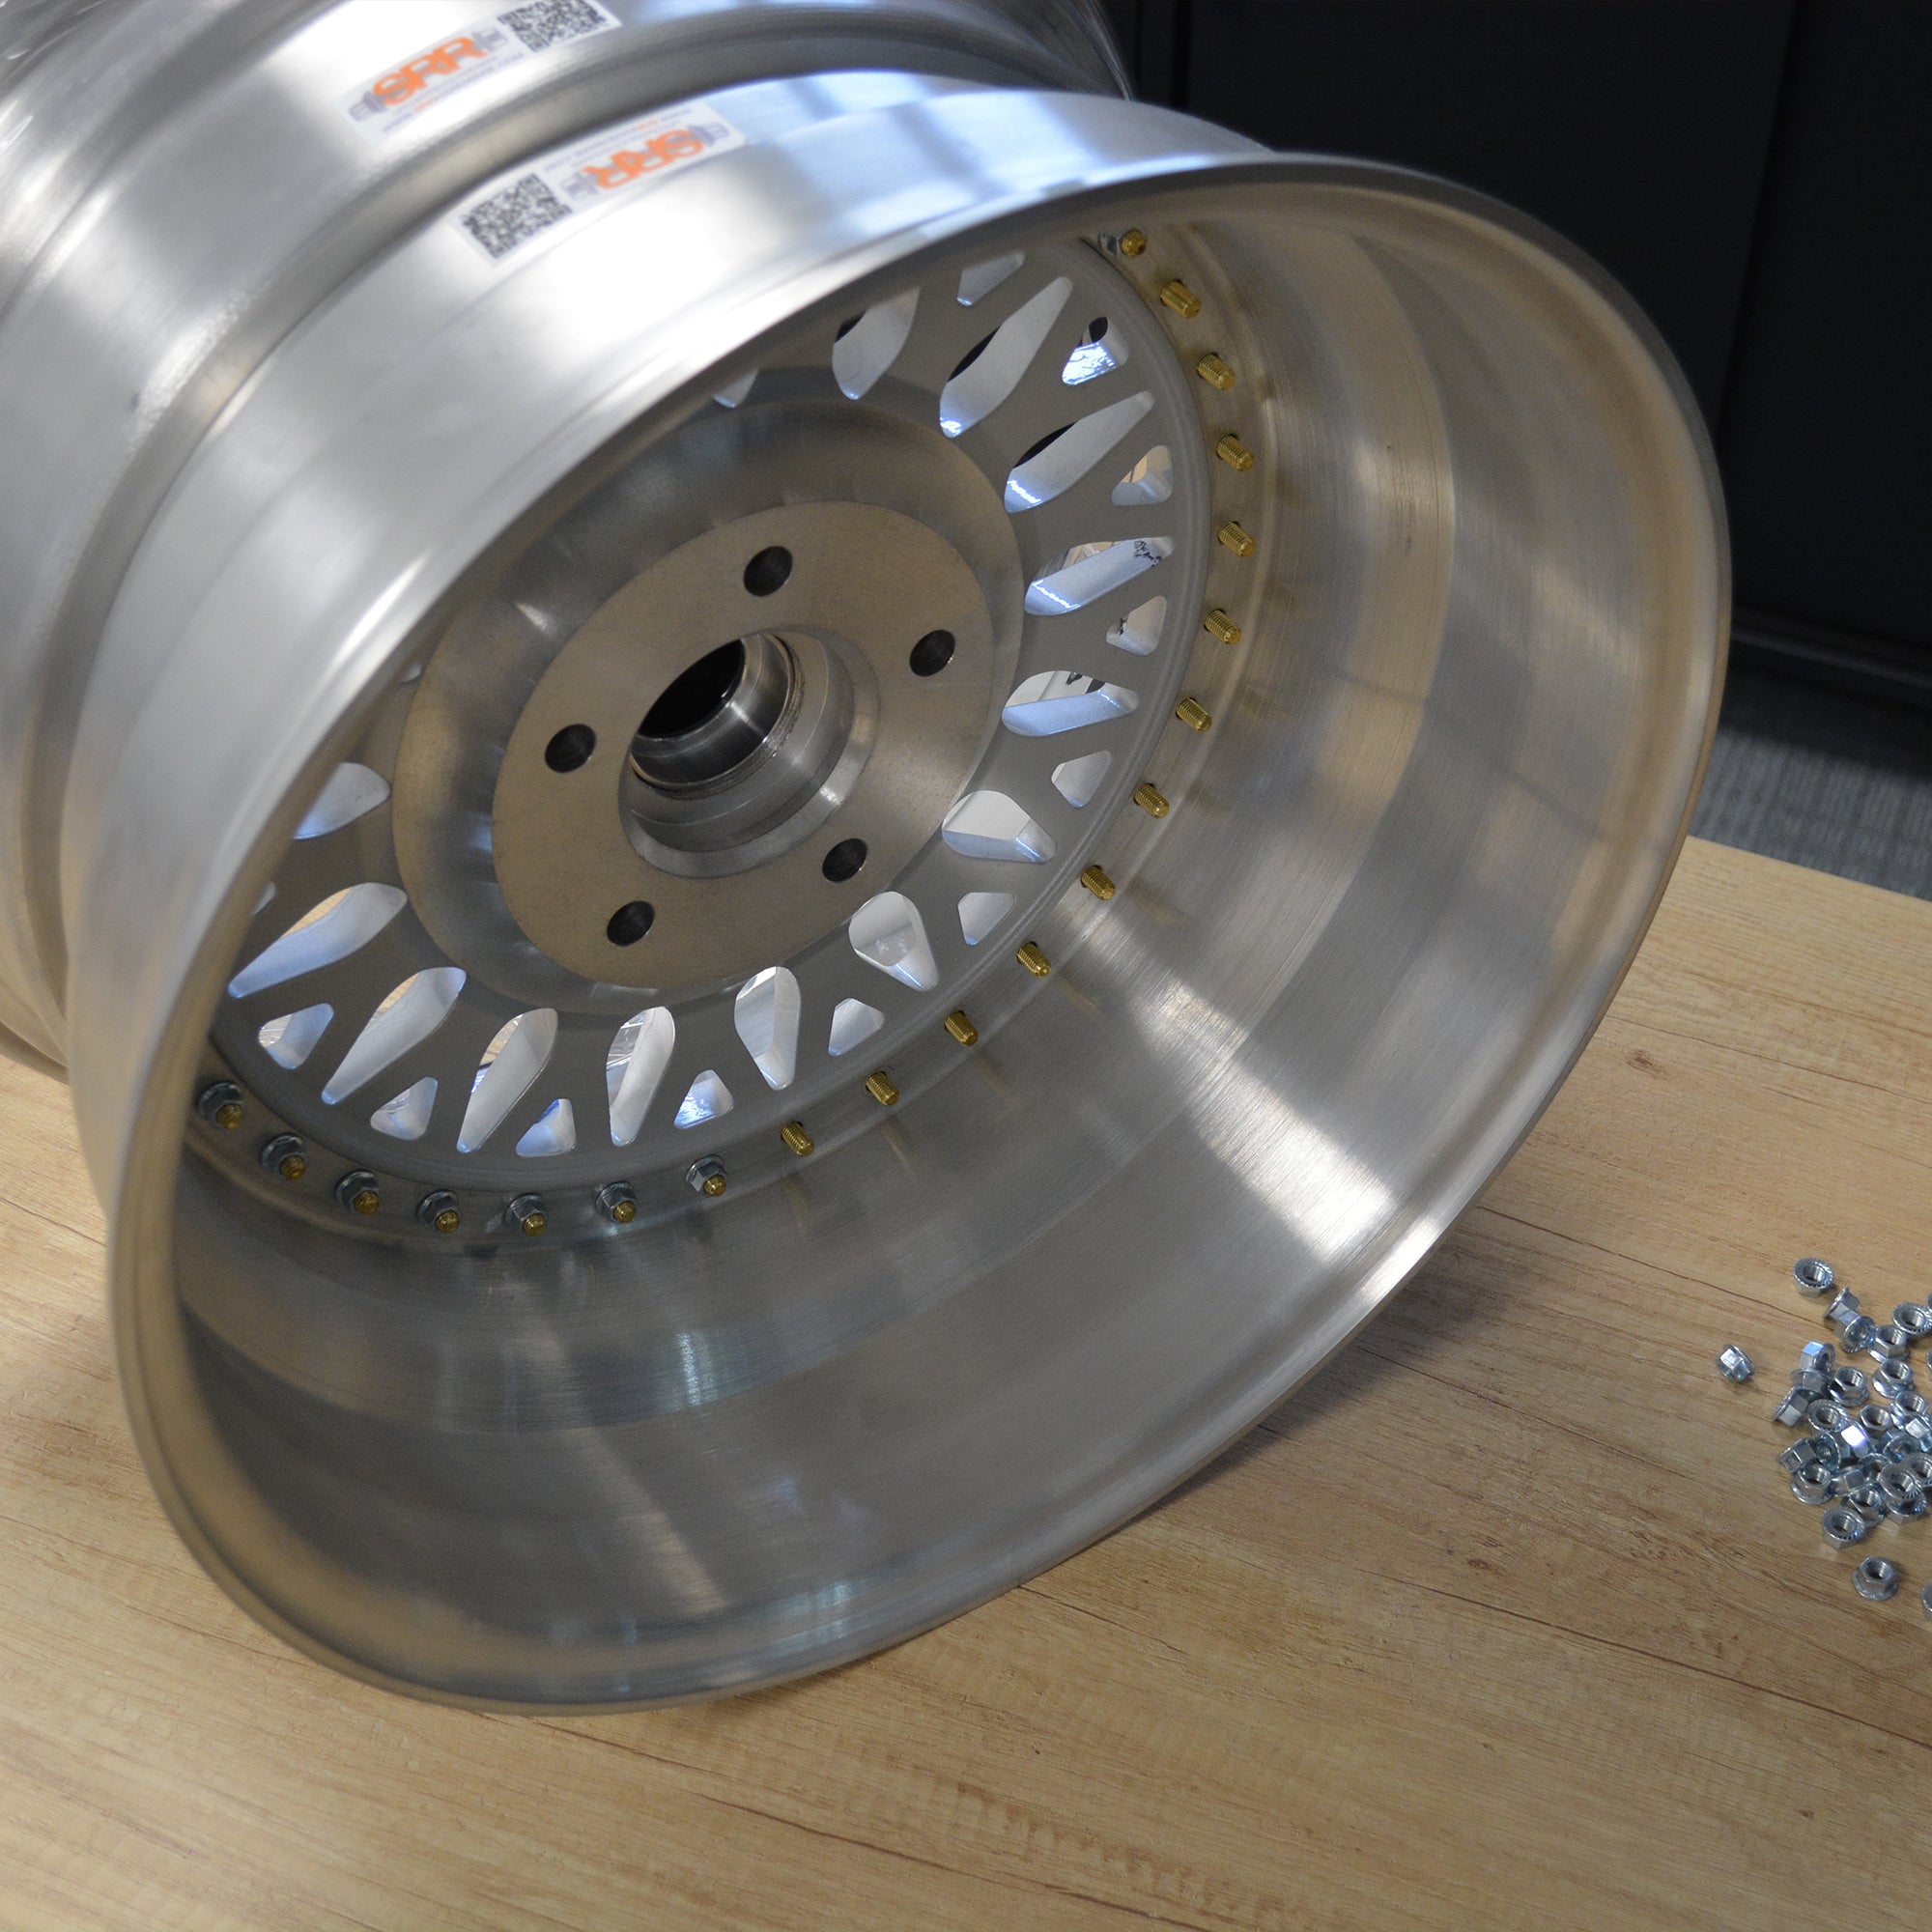
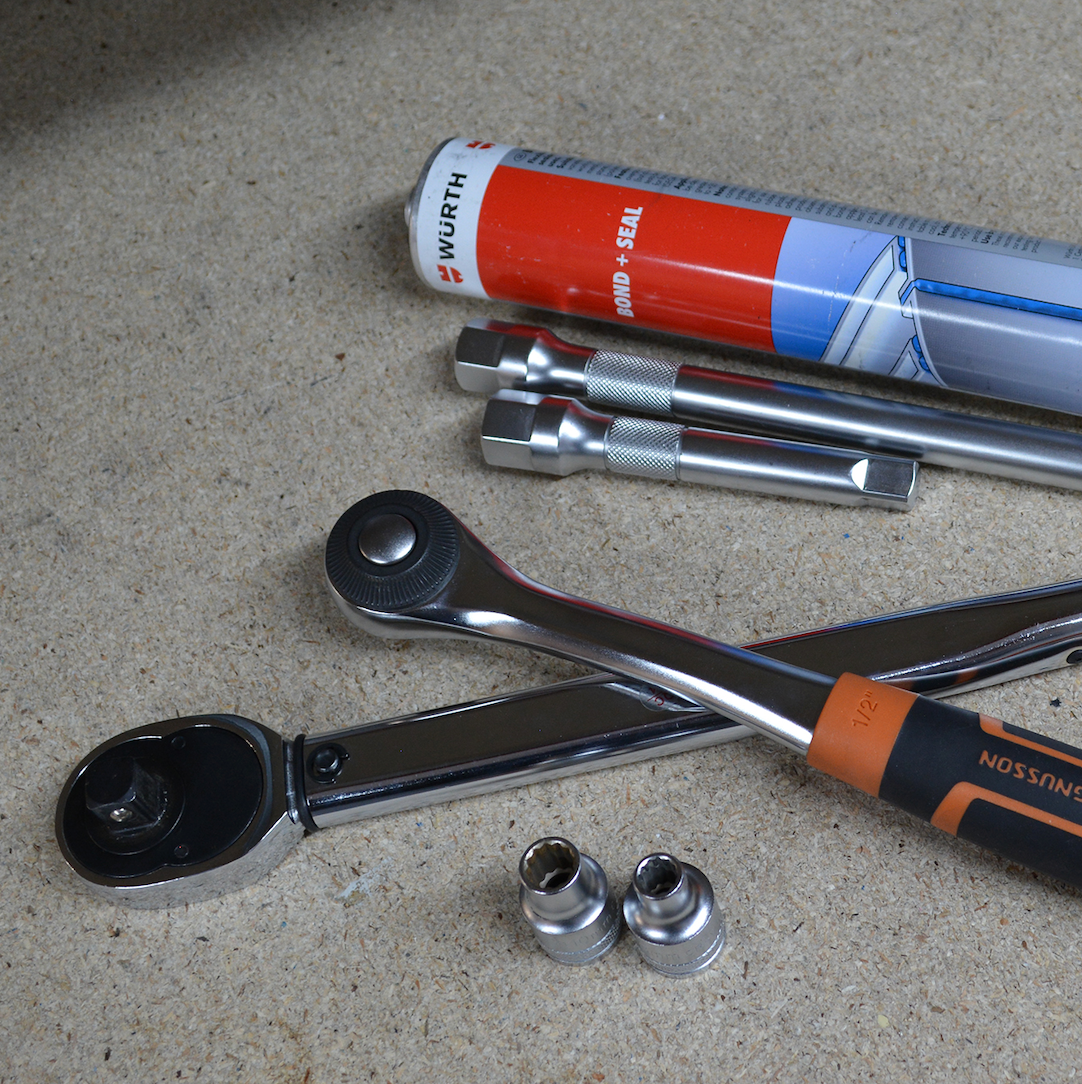
1. Loosen the Bolts: Using a socket set, identify the bolts that connect the outer rim to the center section. These are typically found around the perimeter of the wheel. Loosen the bolts but do not fully remove them. 2. Work in a Star or Cross Pattern: When loosening the bolts, follow a star or cross pattern to maintain even pressure across the wheel. This helps prevent damage and uneven disassembly. 3. Remove the Bolts: Once all the bolts are loosened, fully remove them one by one. Place the bolts in an organized manner to ensure they're not lost. 4. Separate the Outer Rim: Carefully lift and separate the outer rim from the center section. It may be a snug fit due to the O-rings or seals. Gently wiggle and lift to separate the components. 5. Remove the Inner Barrel (if necessary): Depending on your specific wheel design, there may be an inner barrel that's press-fitted onto the center section. To remove it, use the appropriate disassembly tool or follow the manufacturer's instructions. This may involve tapping or pressing to separate the two components. 6. Clean and Maintain: Clean all components thoroughly and inspect them for any damage. This is an ideal time to address any maintenance, such as replacing O-rings, seals, or refinishing the components. Store Components Safely: Store the disassembled components in a clean and safe area to prevent any contamination or damage.
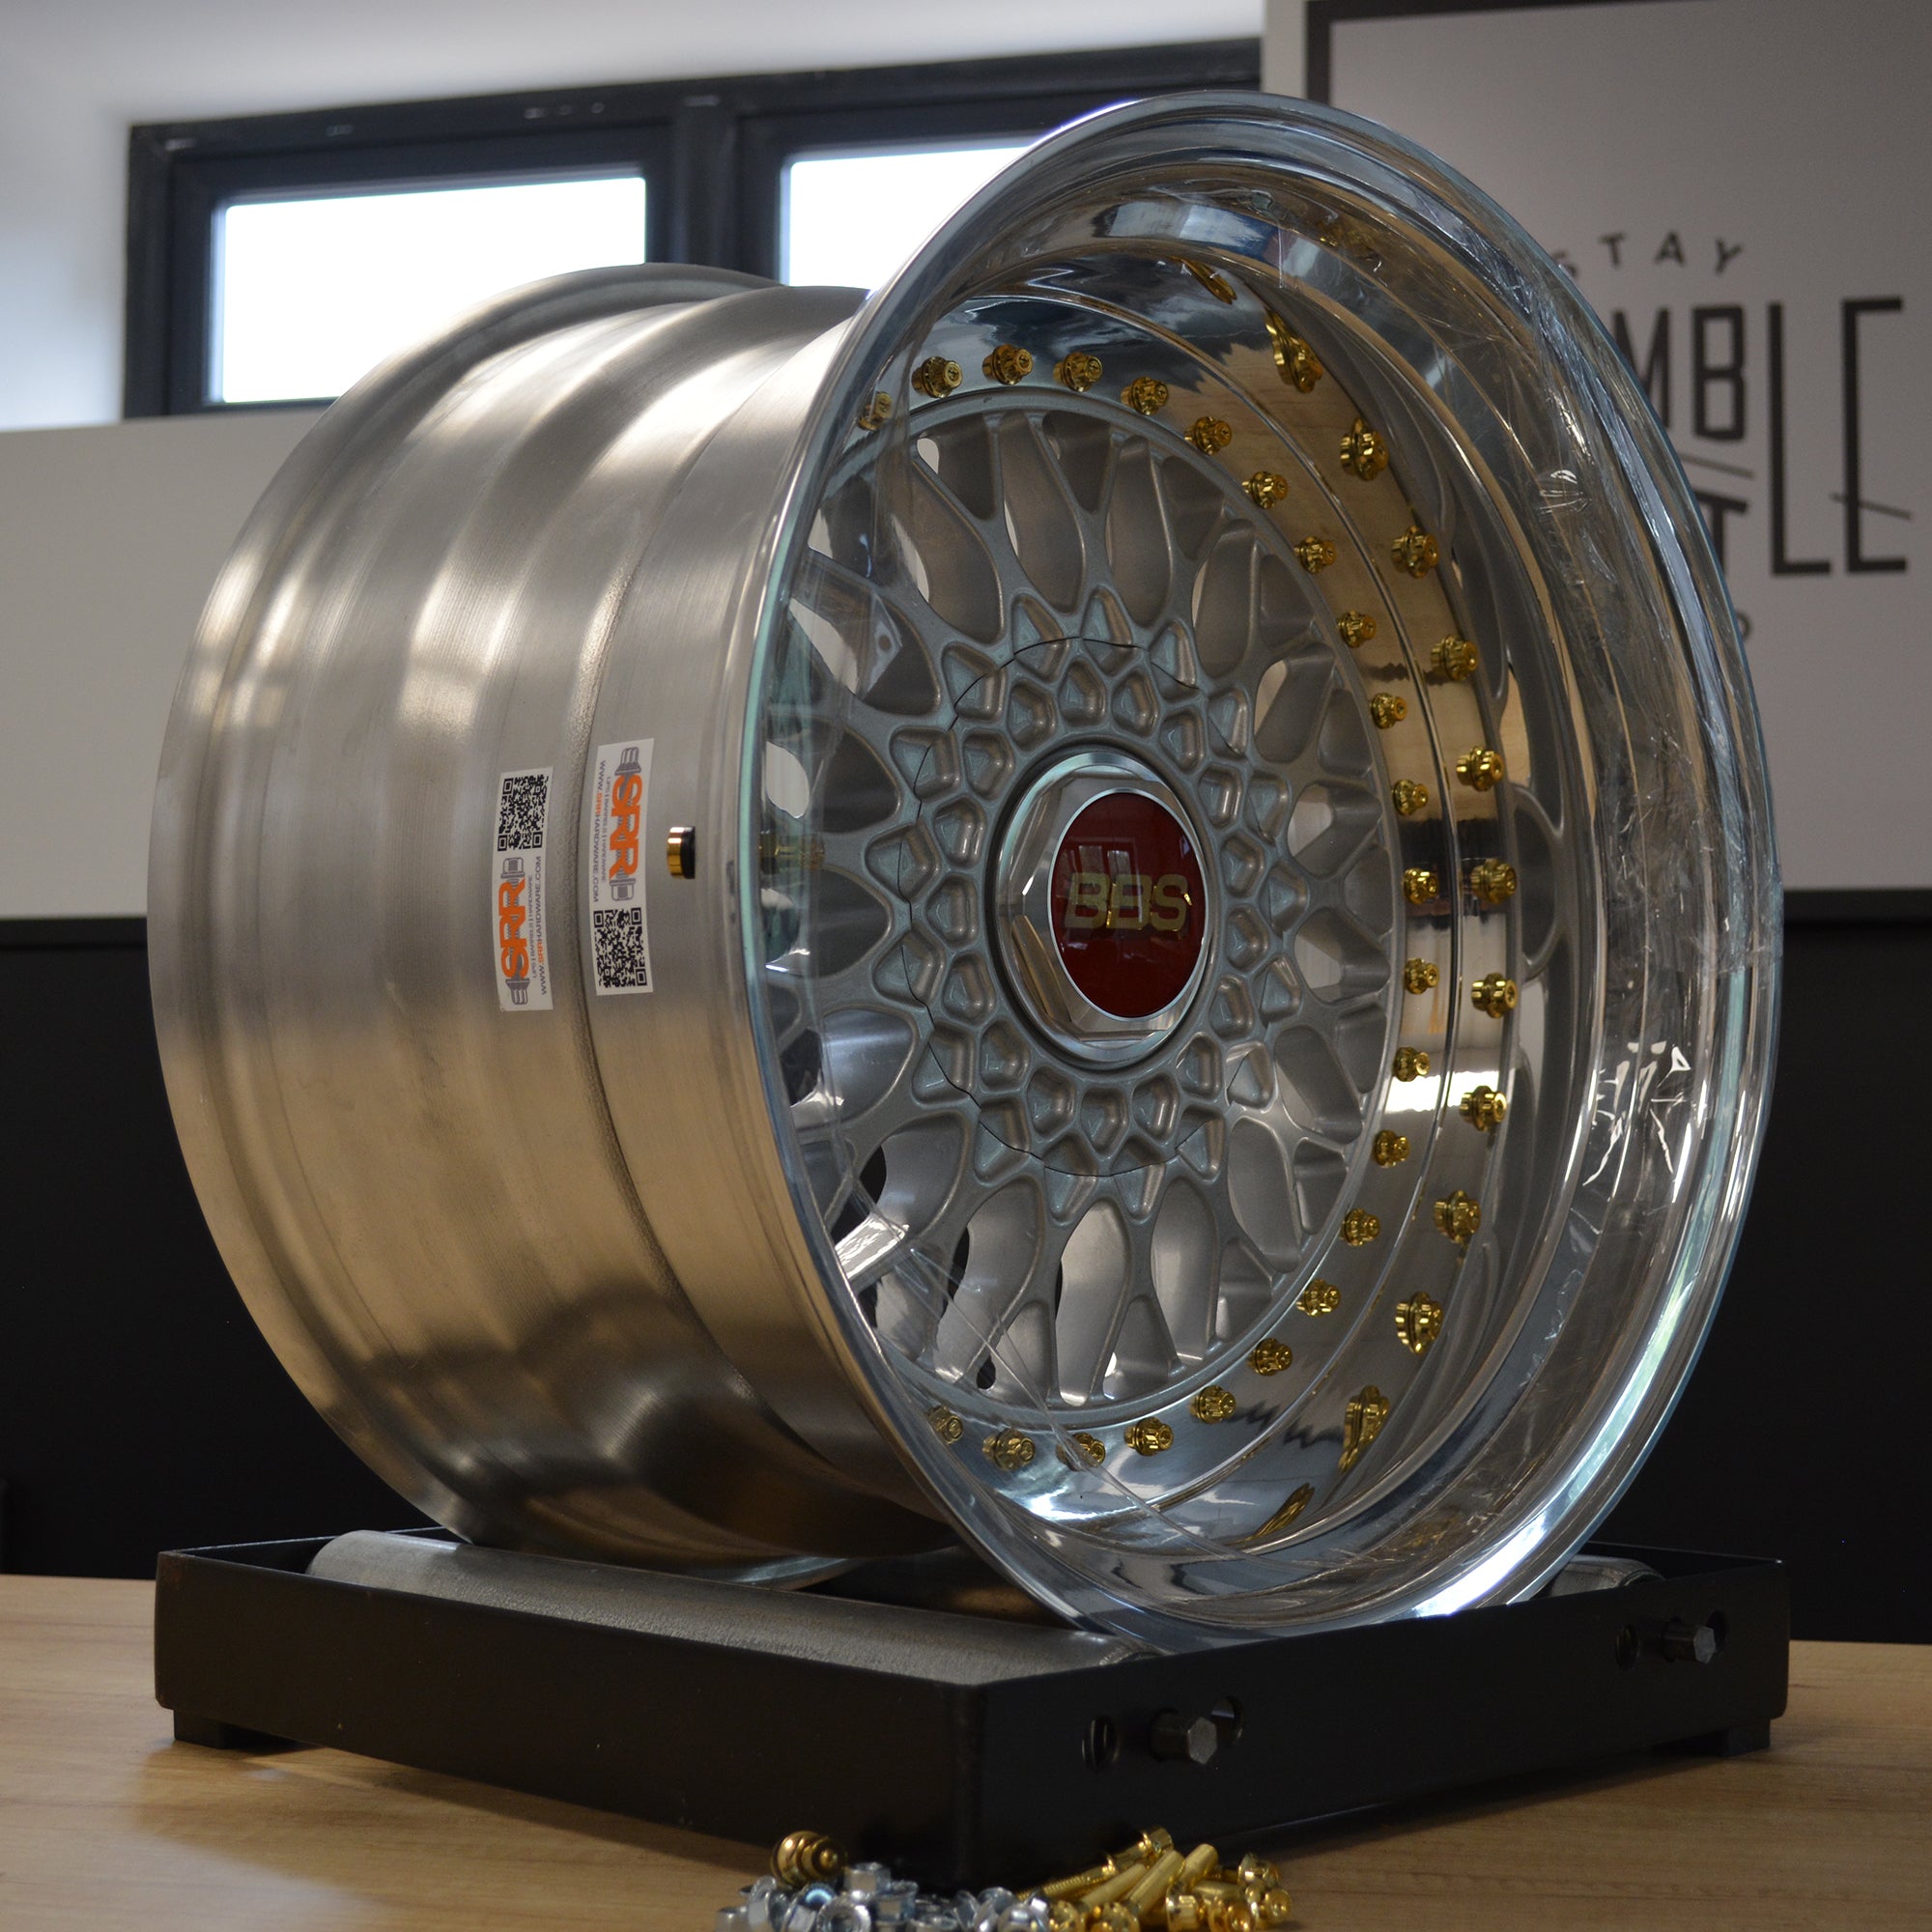
Referring to the process of putting together or building a set of wheels for a vehicle. Three-piece modular wheels consist of three main components: the center disc, inner barrel, and outer lip, and assembling them involves attaching these components to create a complete wheel. Here's what's typically involved in assembling three-piece modular wheels:
1. Mount the Center: Place the center section of the wheel onto a suitable work surface with the hub mounting face facing up. 2. Install the Outer Wheel Lip: Carefully position the inner barrel onto the center section. Ensure it's aligned correctly with the mounting holes on the center section. 3. Install Mounting Hardware: Insert the mounting bolts through the holes in the center section, through the inner barrel, and partially into the outer rim. Ensure that all the bolts are properly aligned and threaded. 4. Tighten Bolts: Using a torque wrench, gradually tighten the mounting bolts to the manufacturer's recommended torque specifications. It's essential to tighten the bolts in a star or cross-pattern to ensure even pressure on all sides of the wheel. Apply Threadlocker (if necessary): Some wheels may require the application of threadlocker adhesive to the mounting hardware to prevent loosening due to vibration. Follow the manufacturer's recommendations for the specific threadlocker type and application. 5. Check Torque Settings: Double-check the torque settings on all the mounting bolts to ensure they are properly tightened. Confirm that all bolts are securely fastened. 6. Valves: Install correct valves onto the lips.
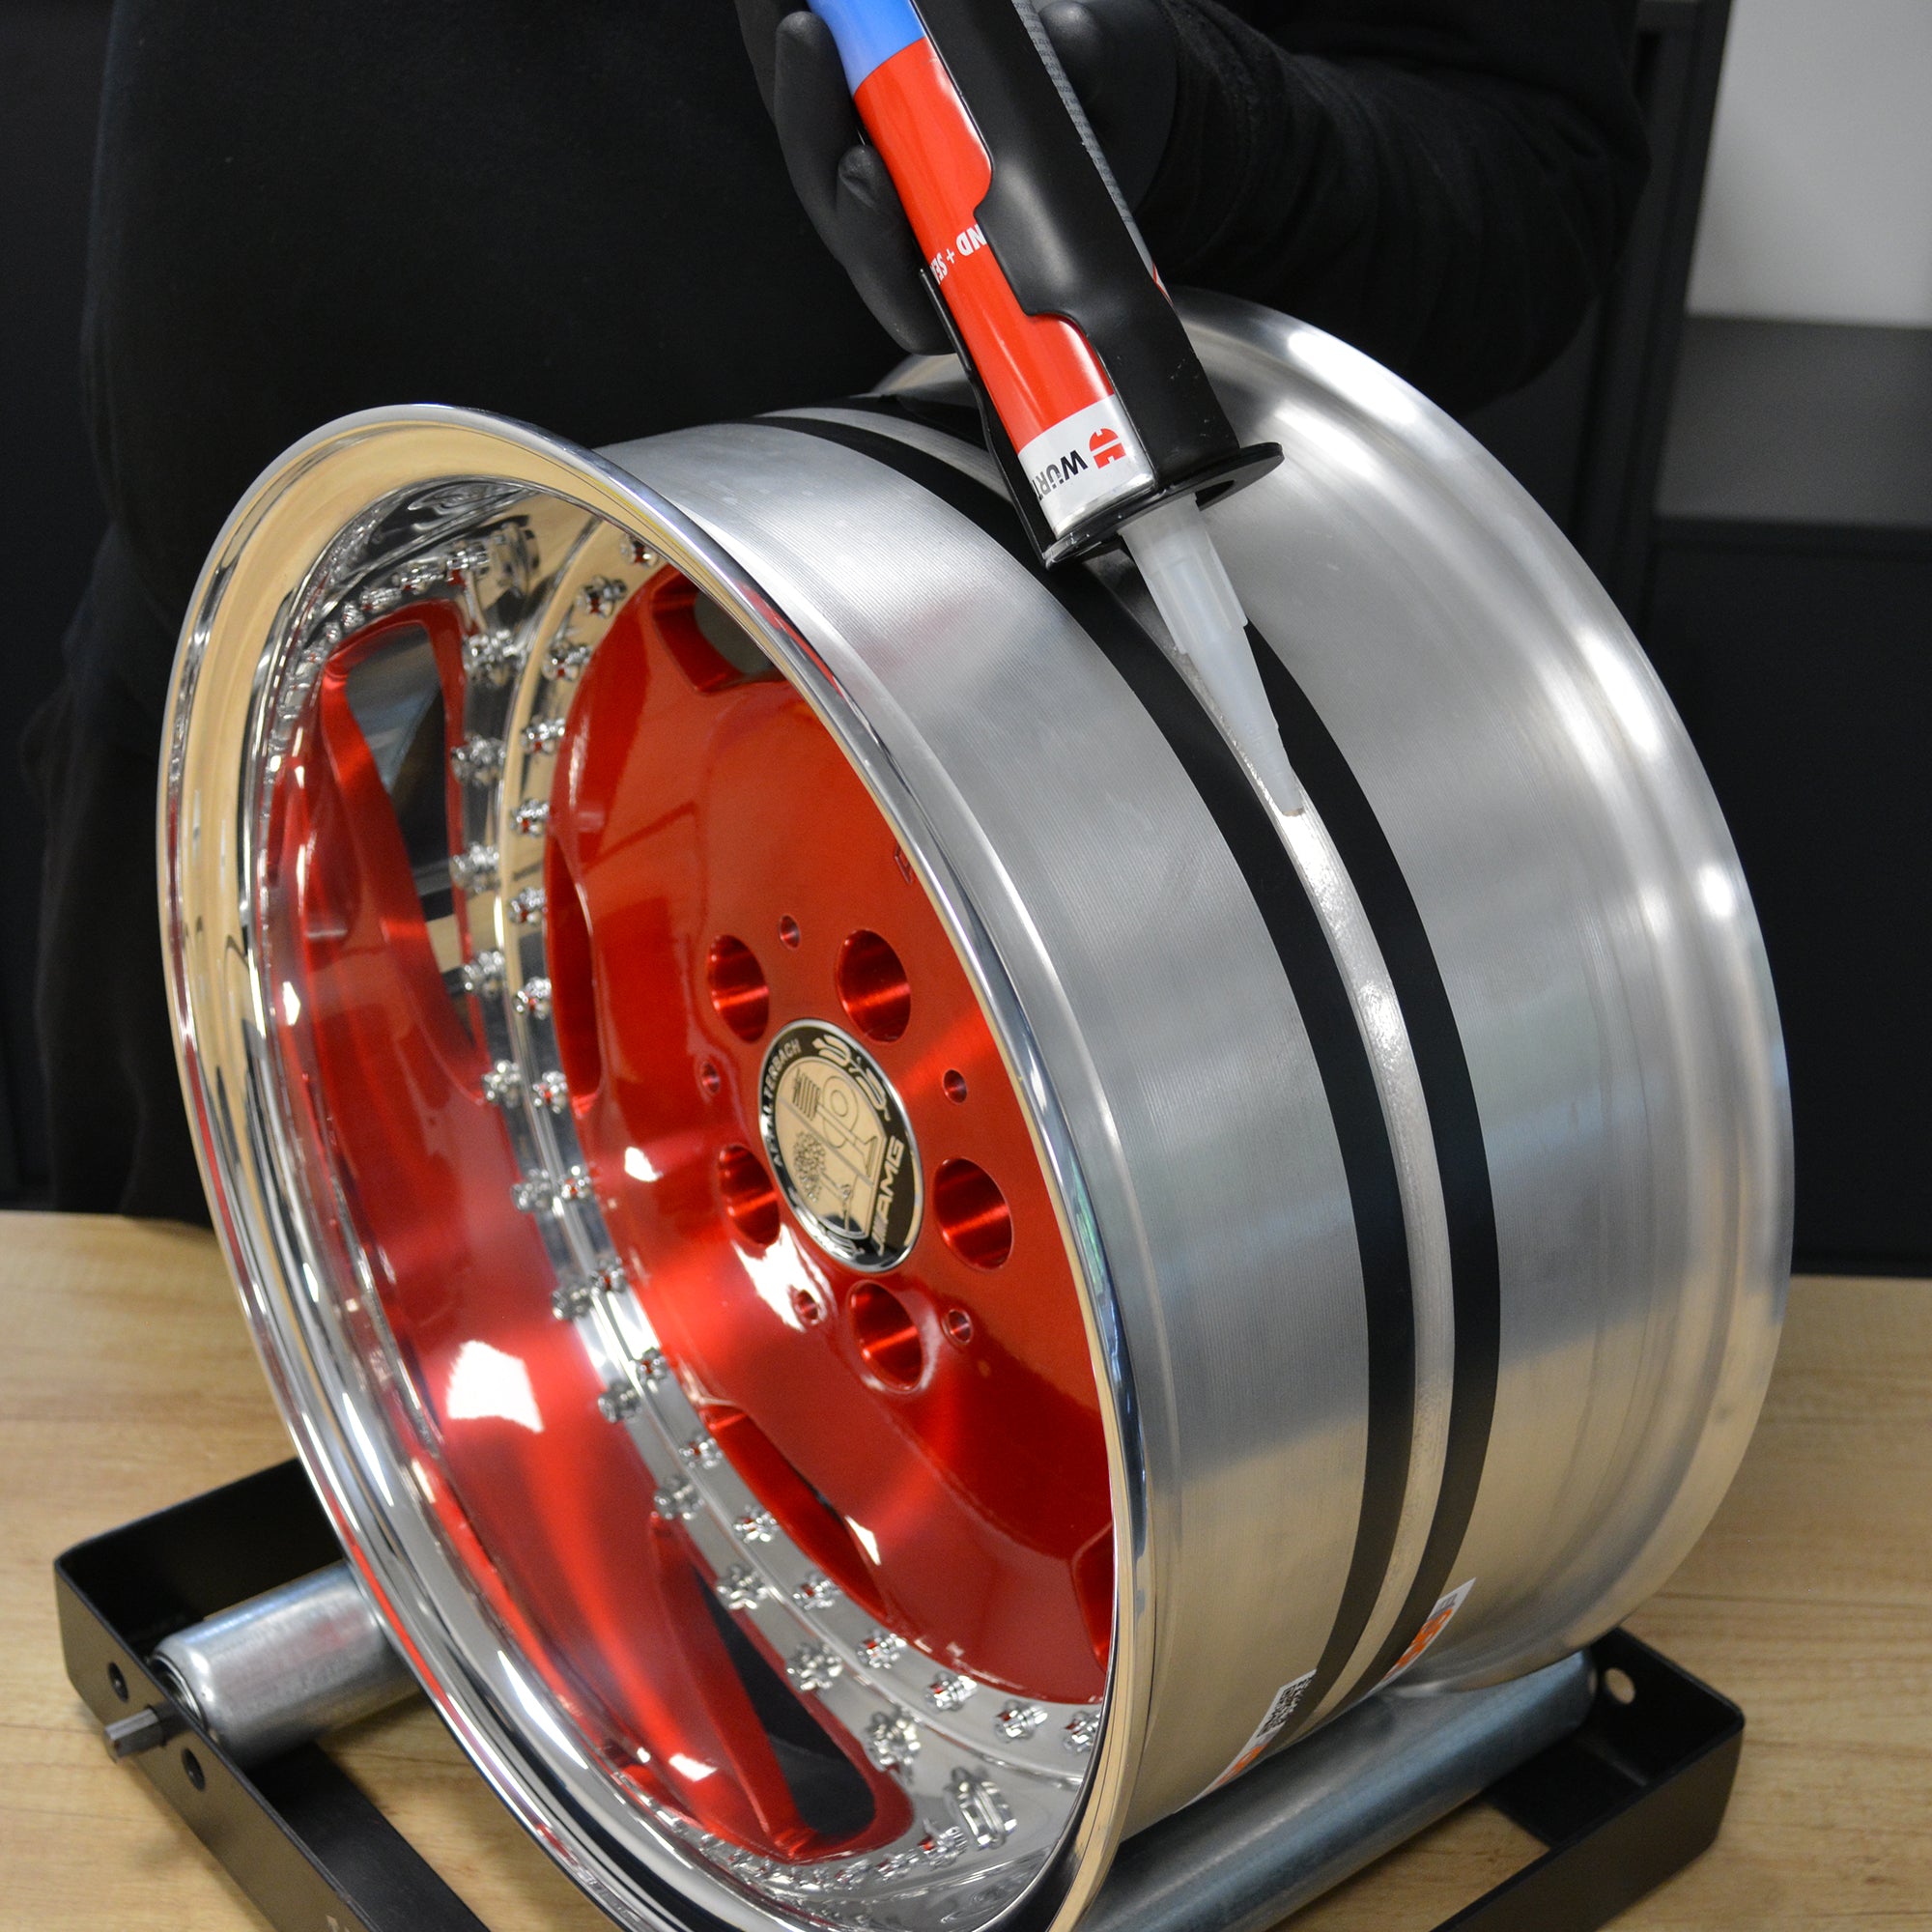
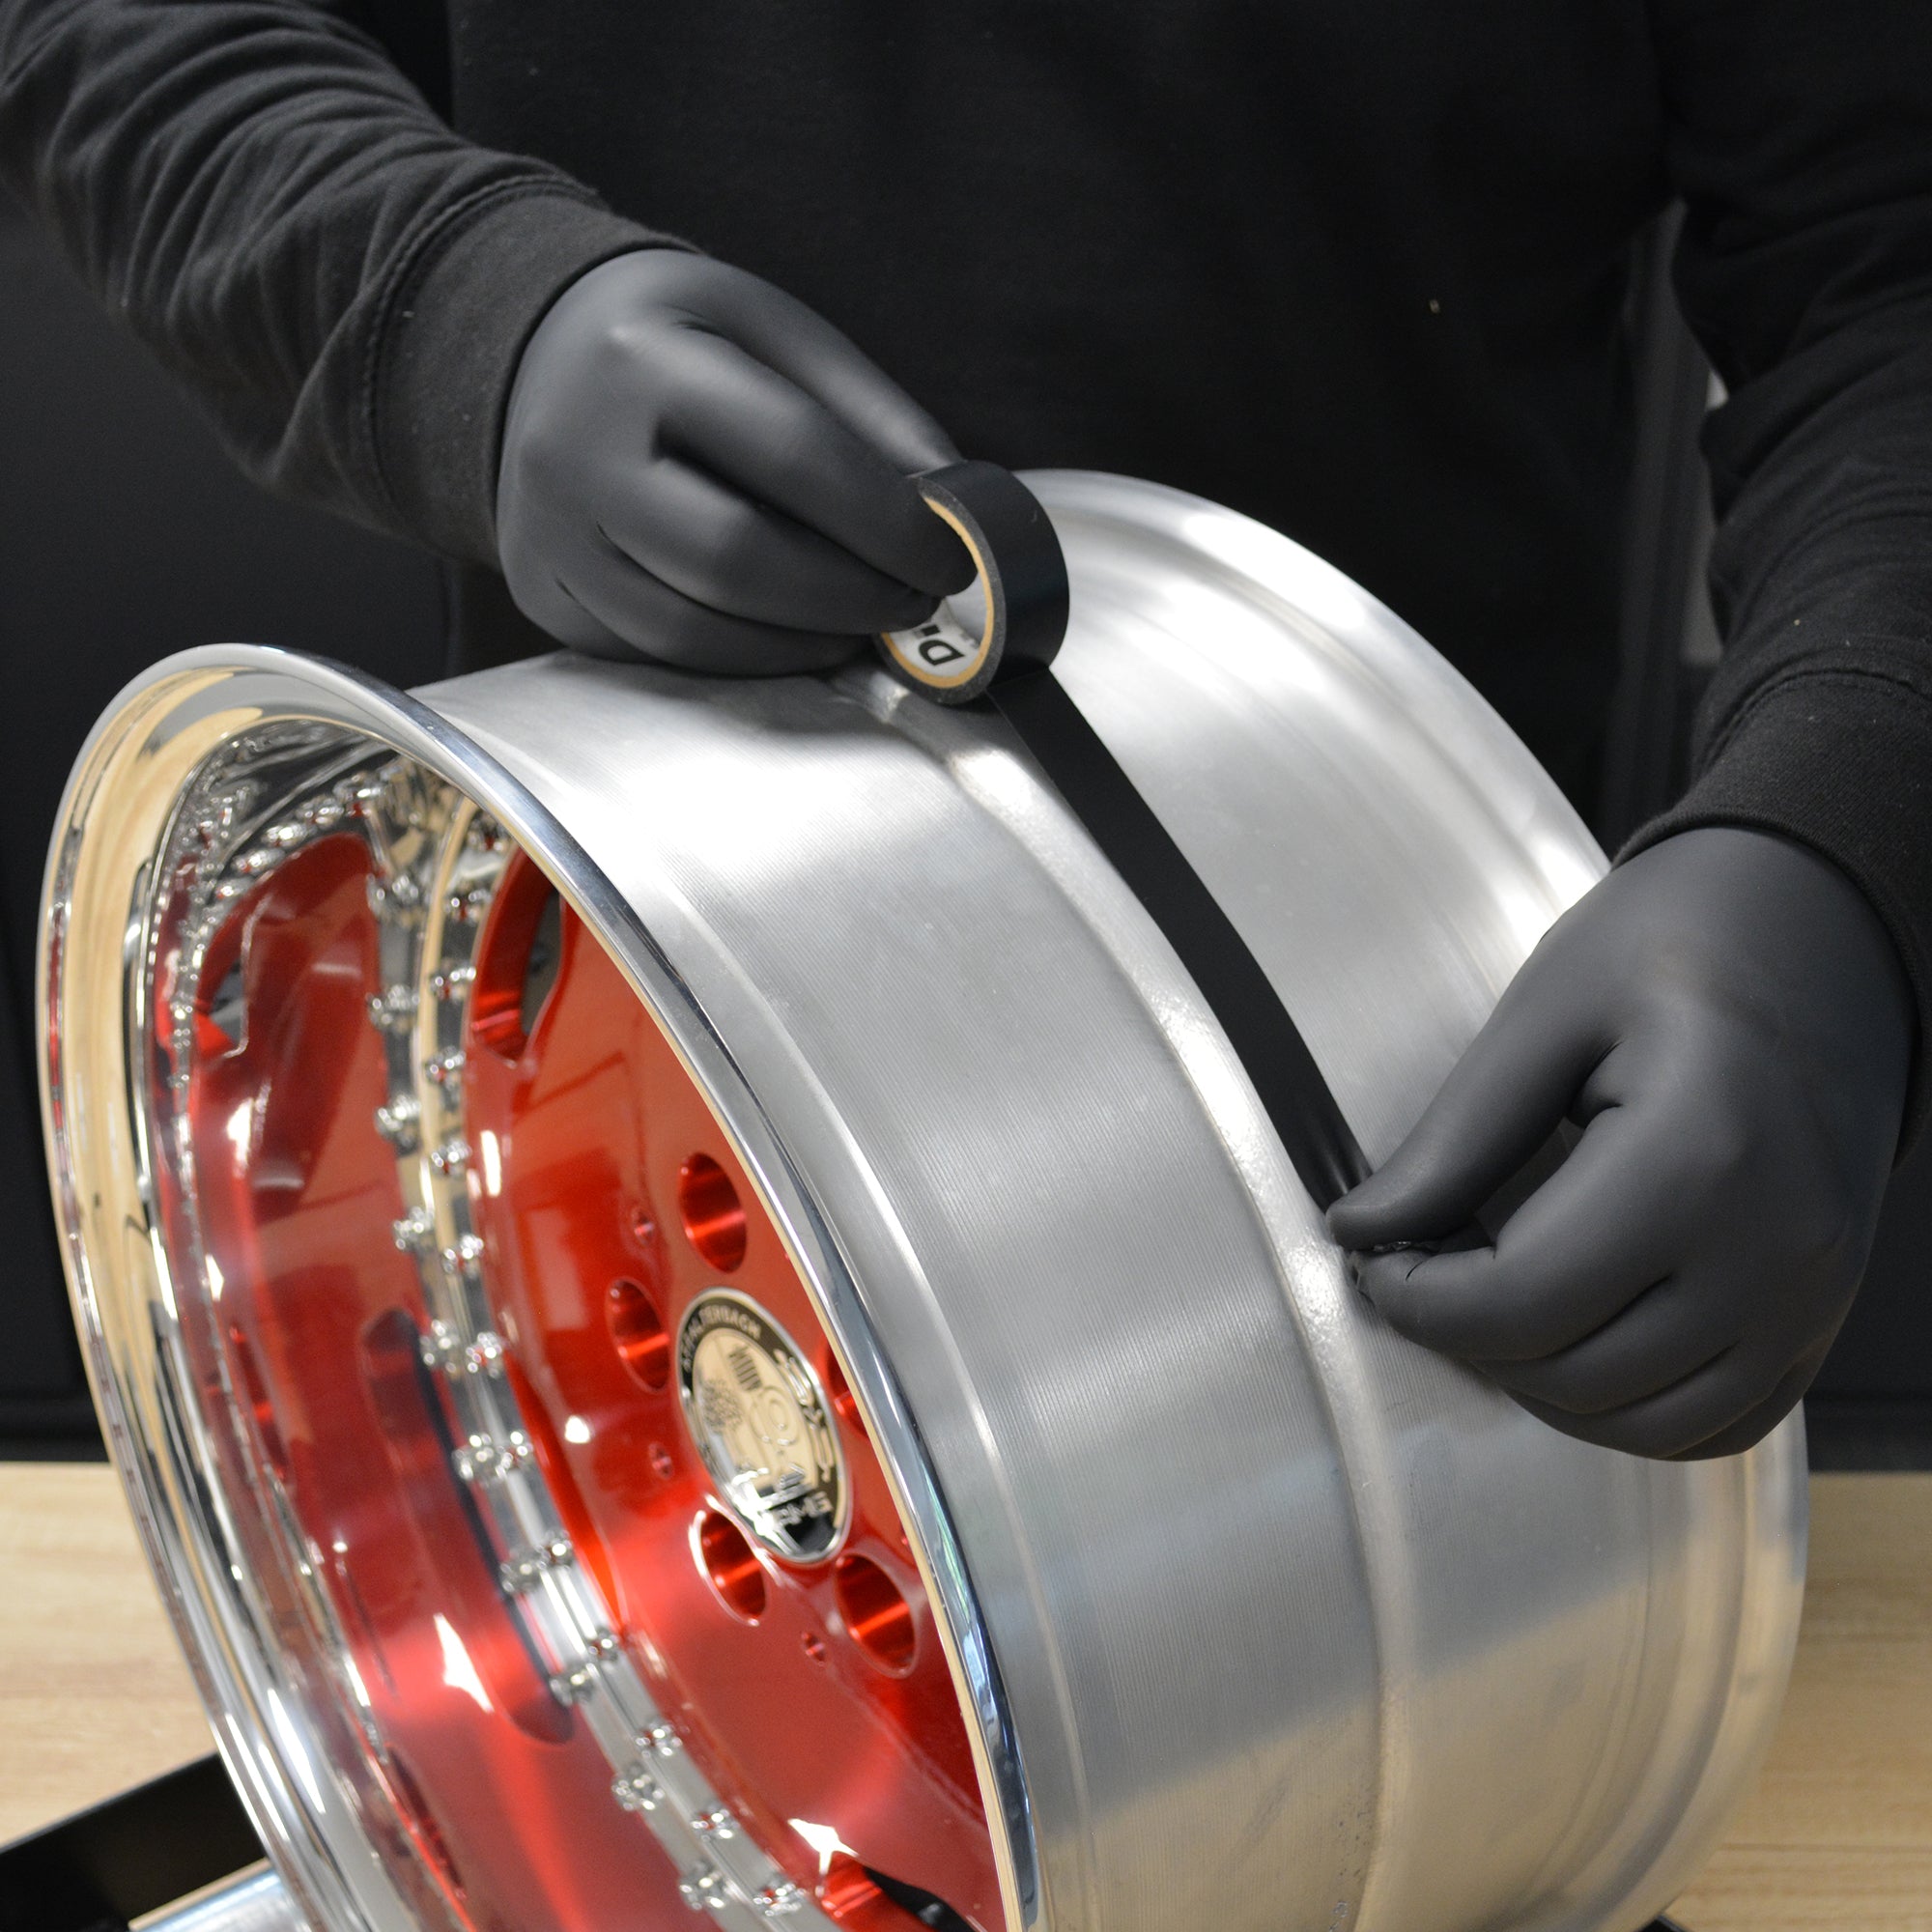
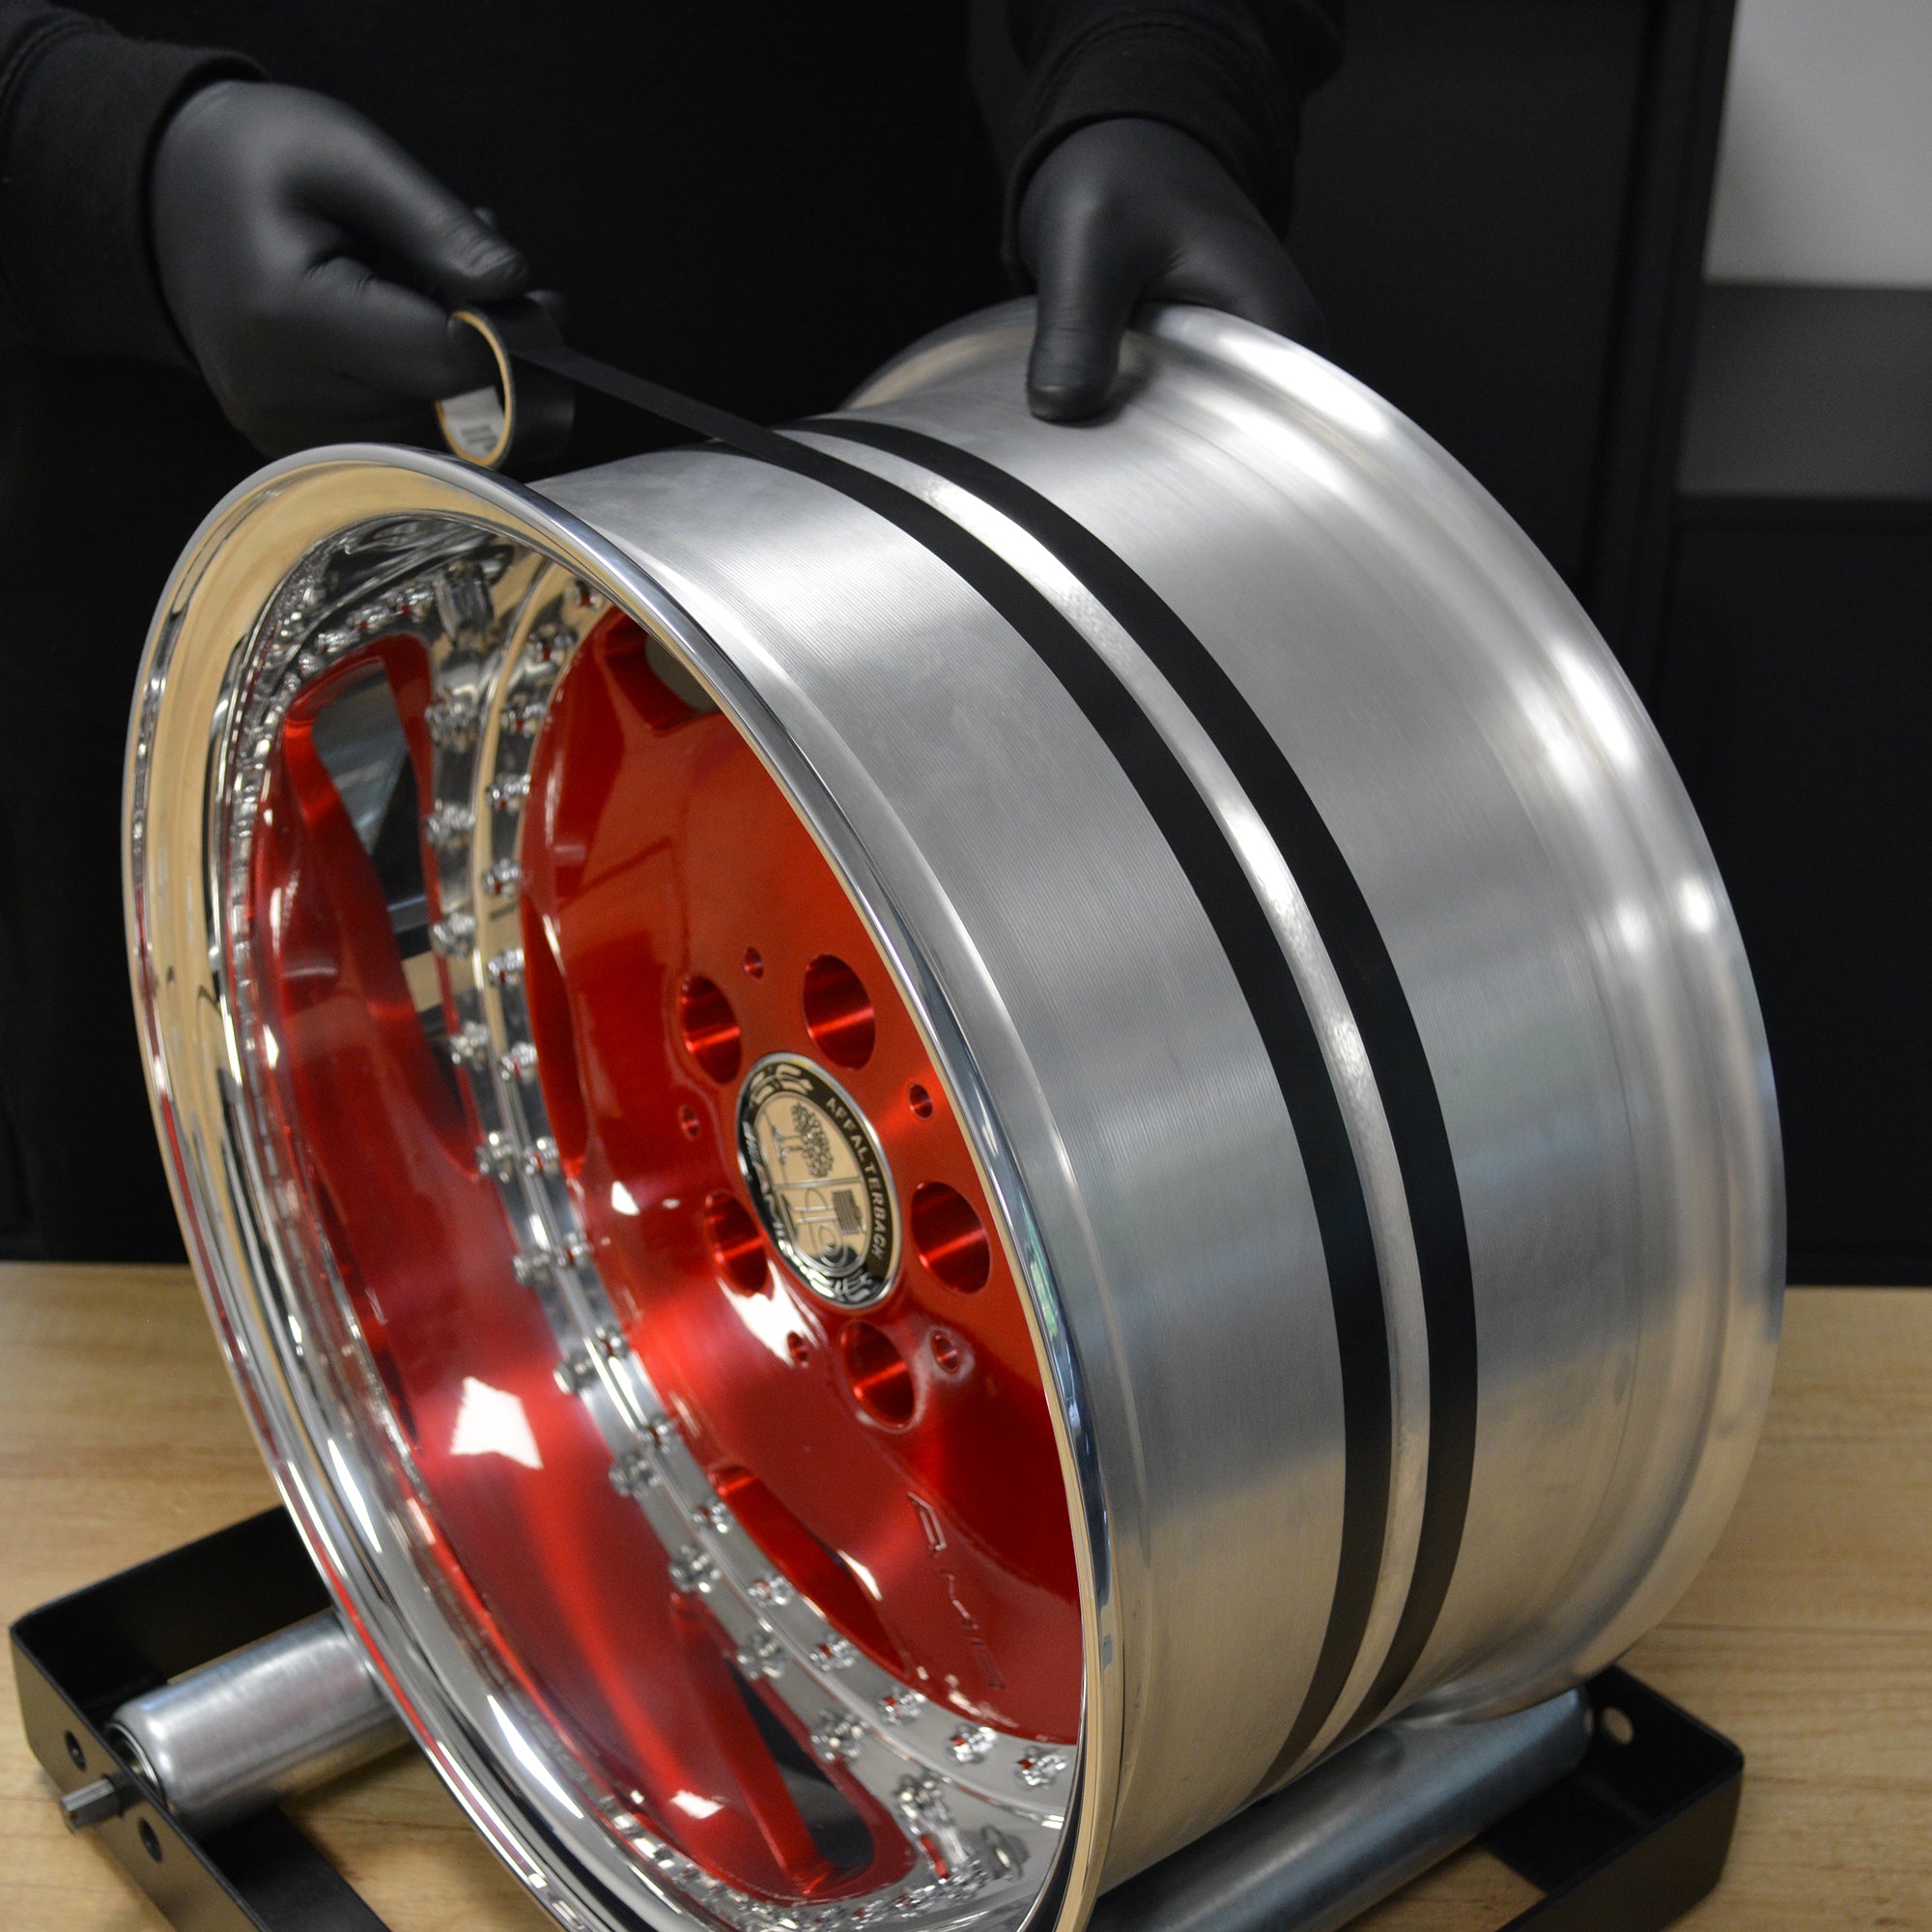
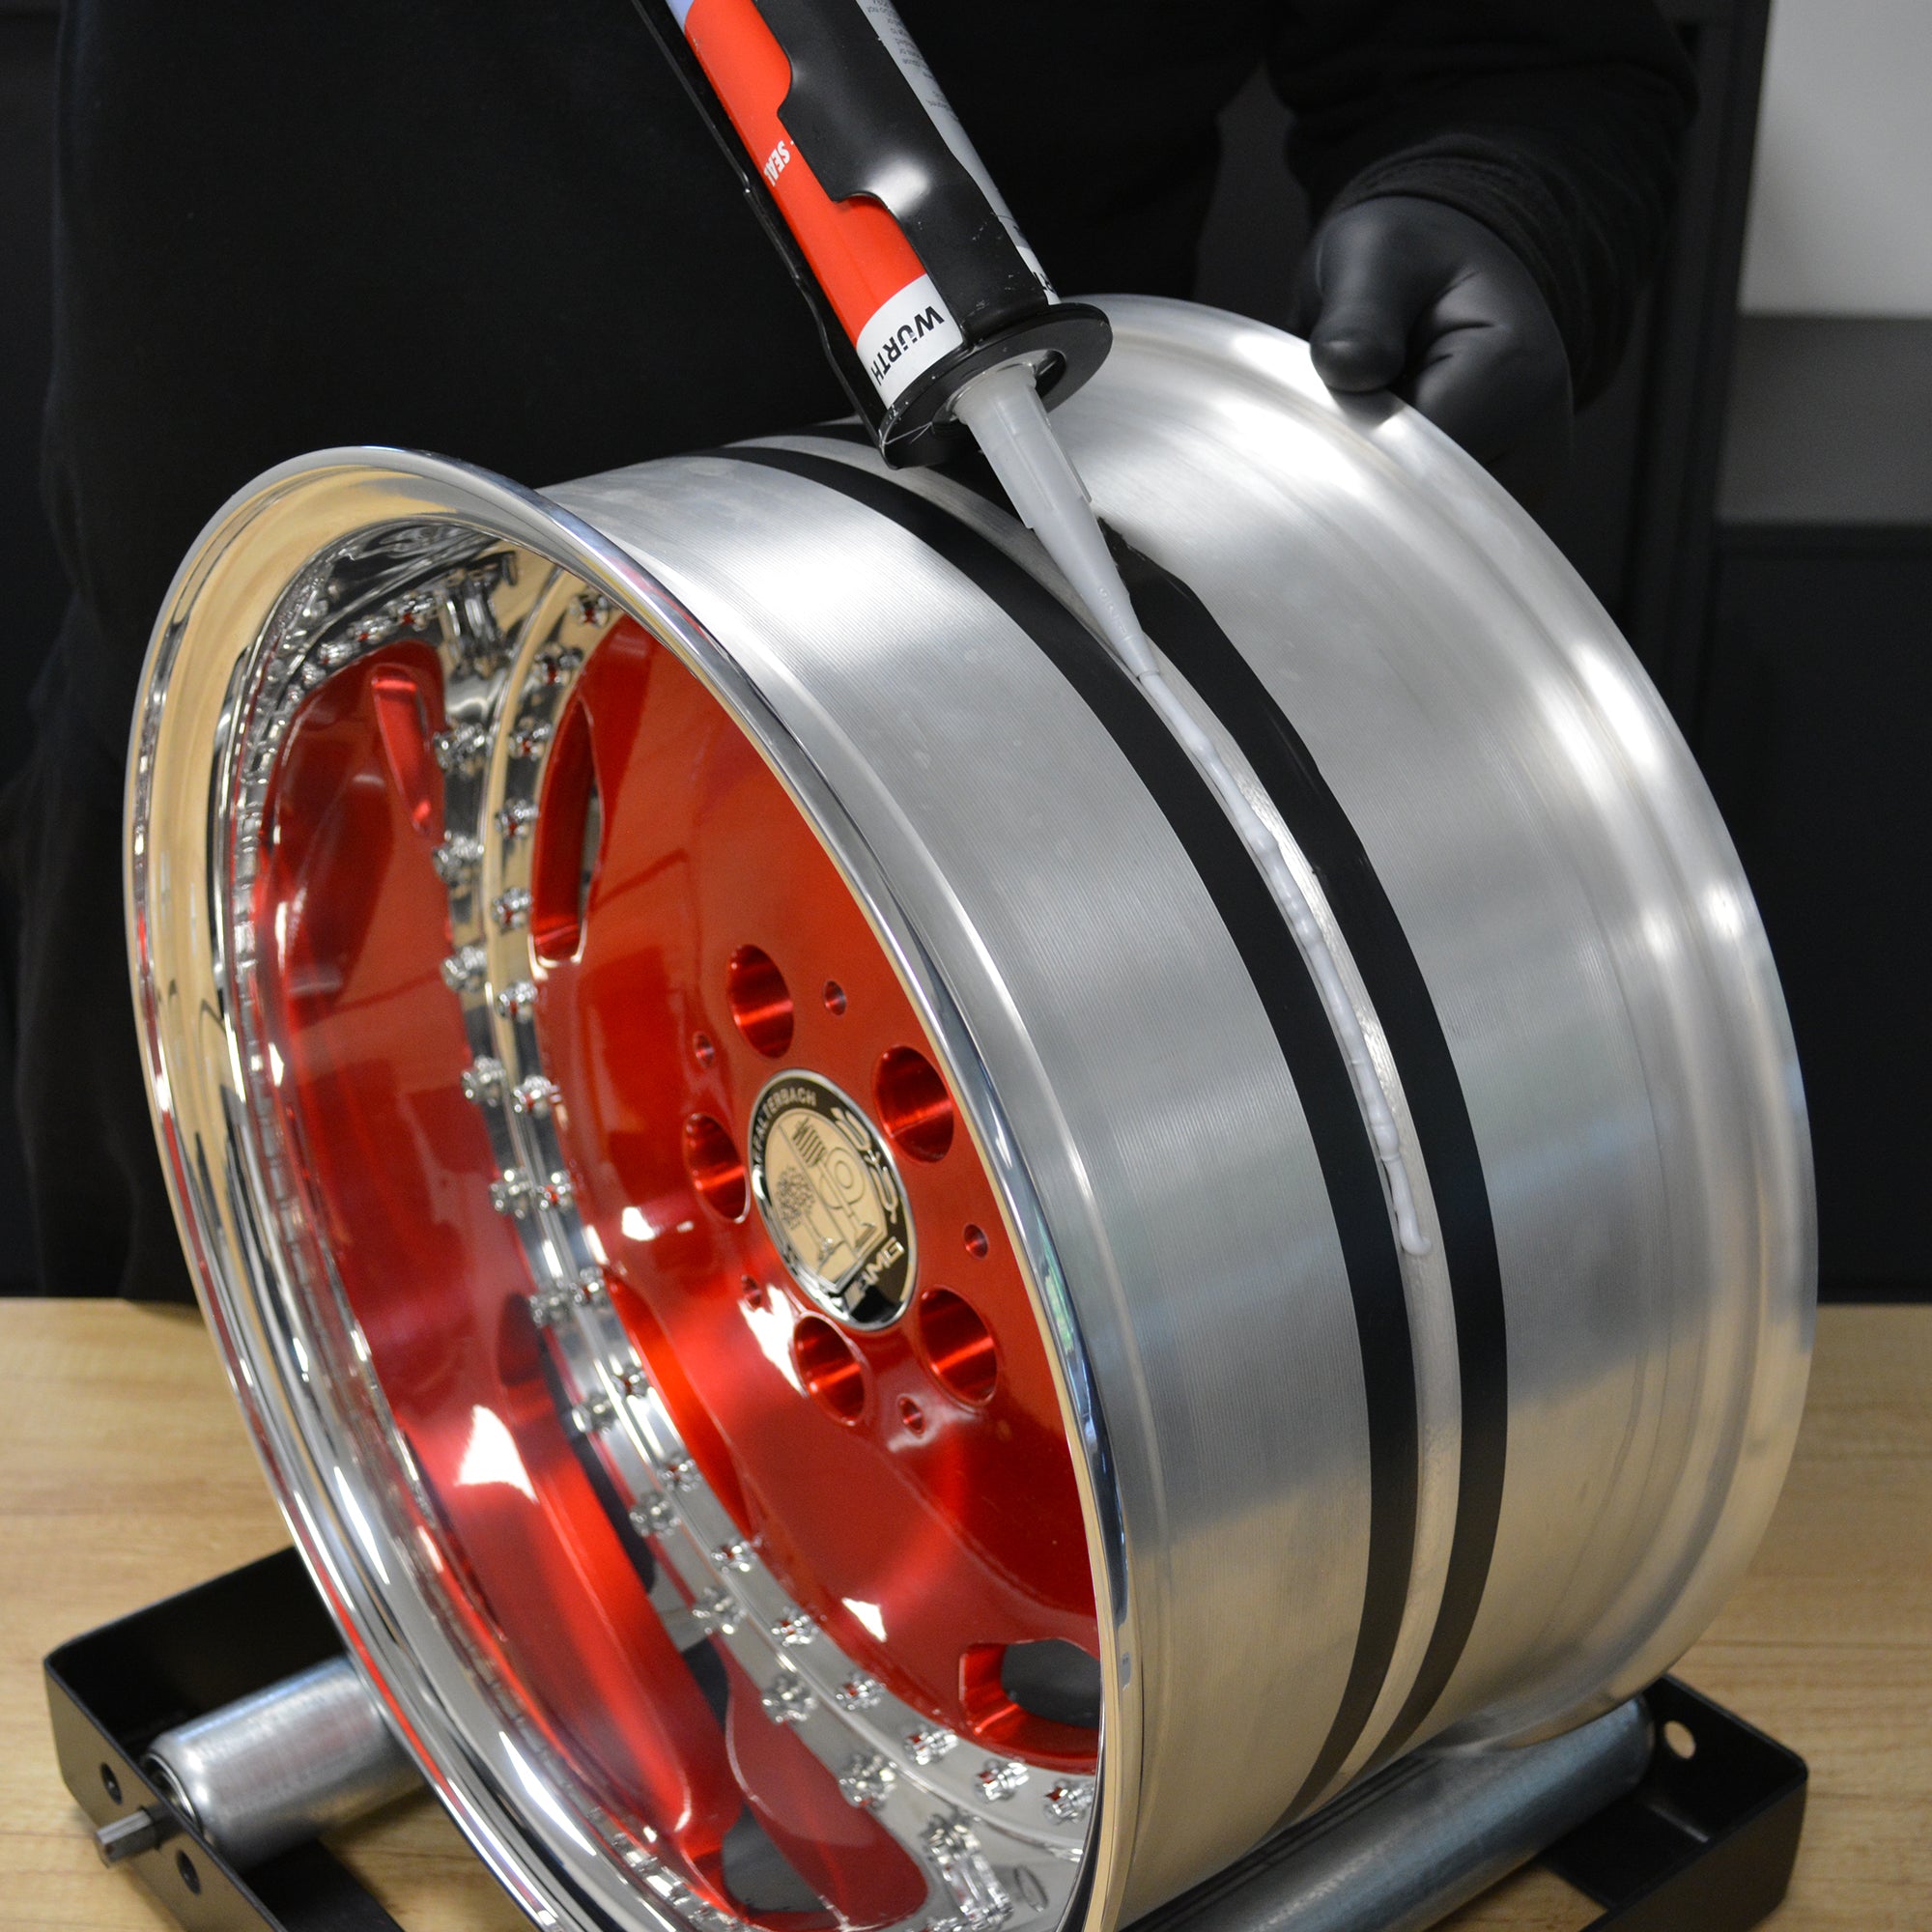
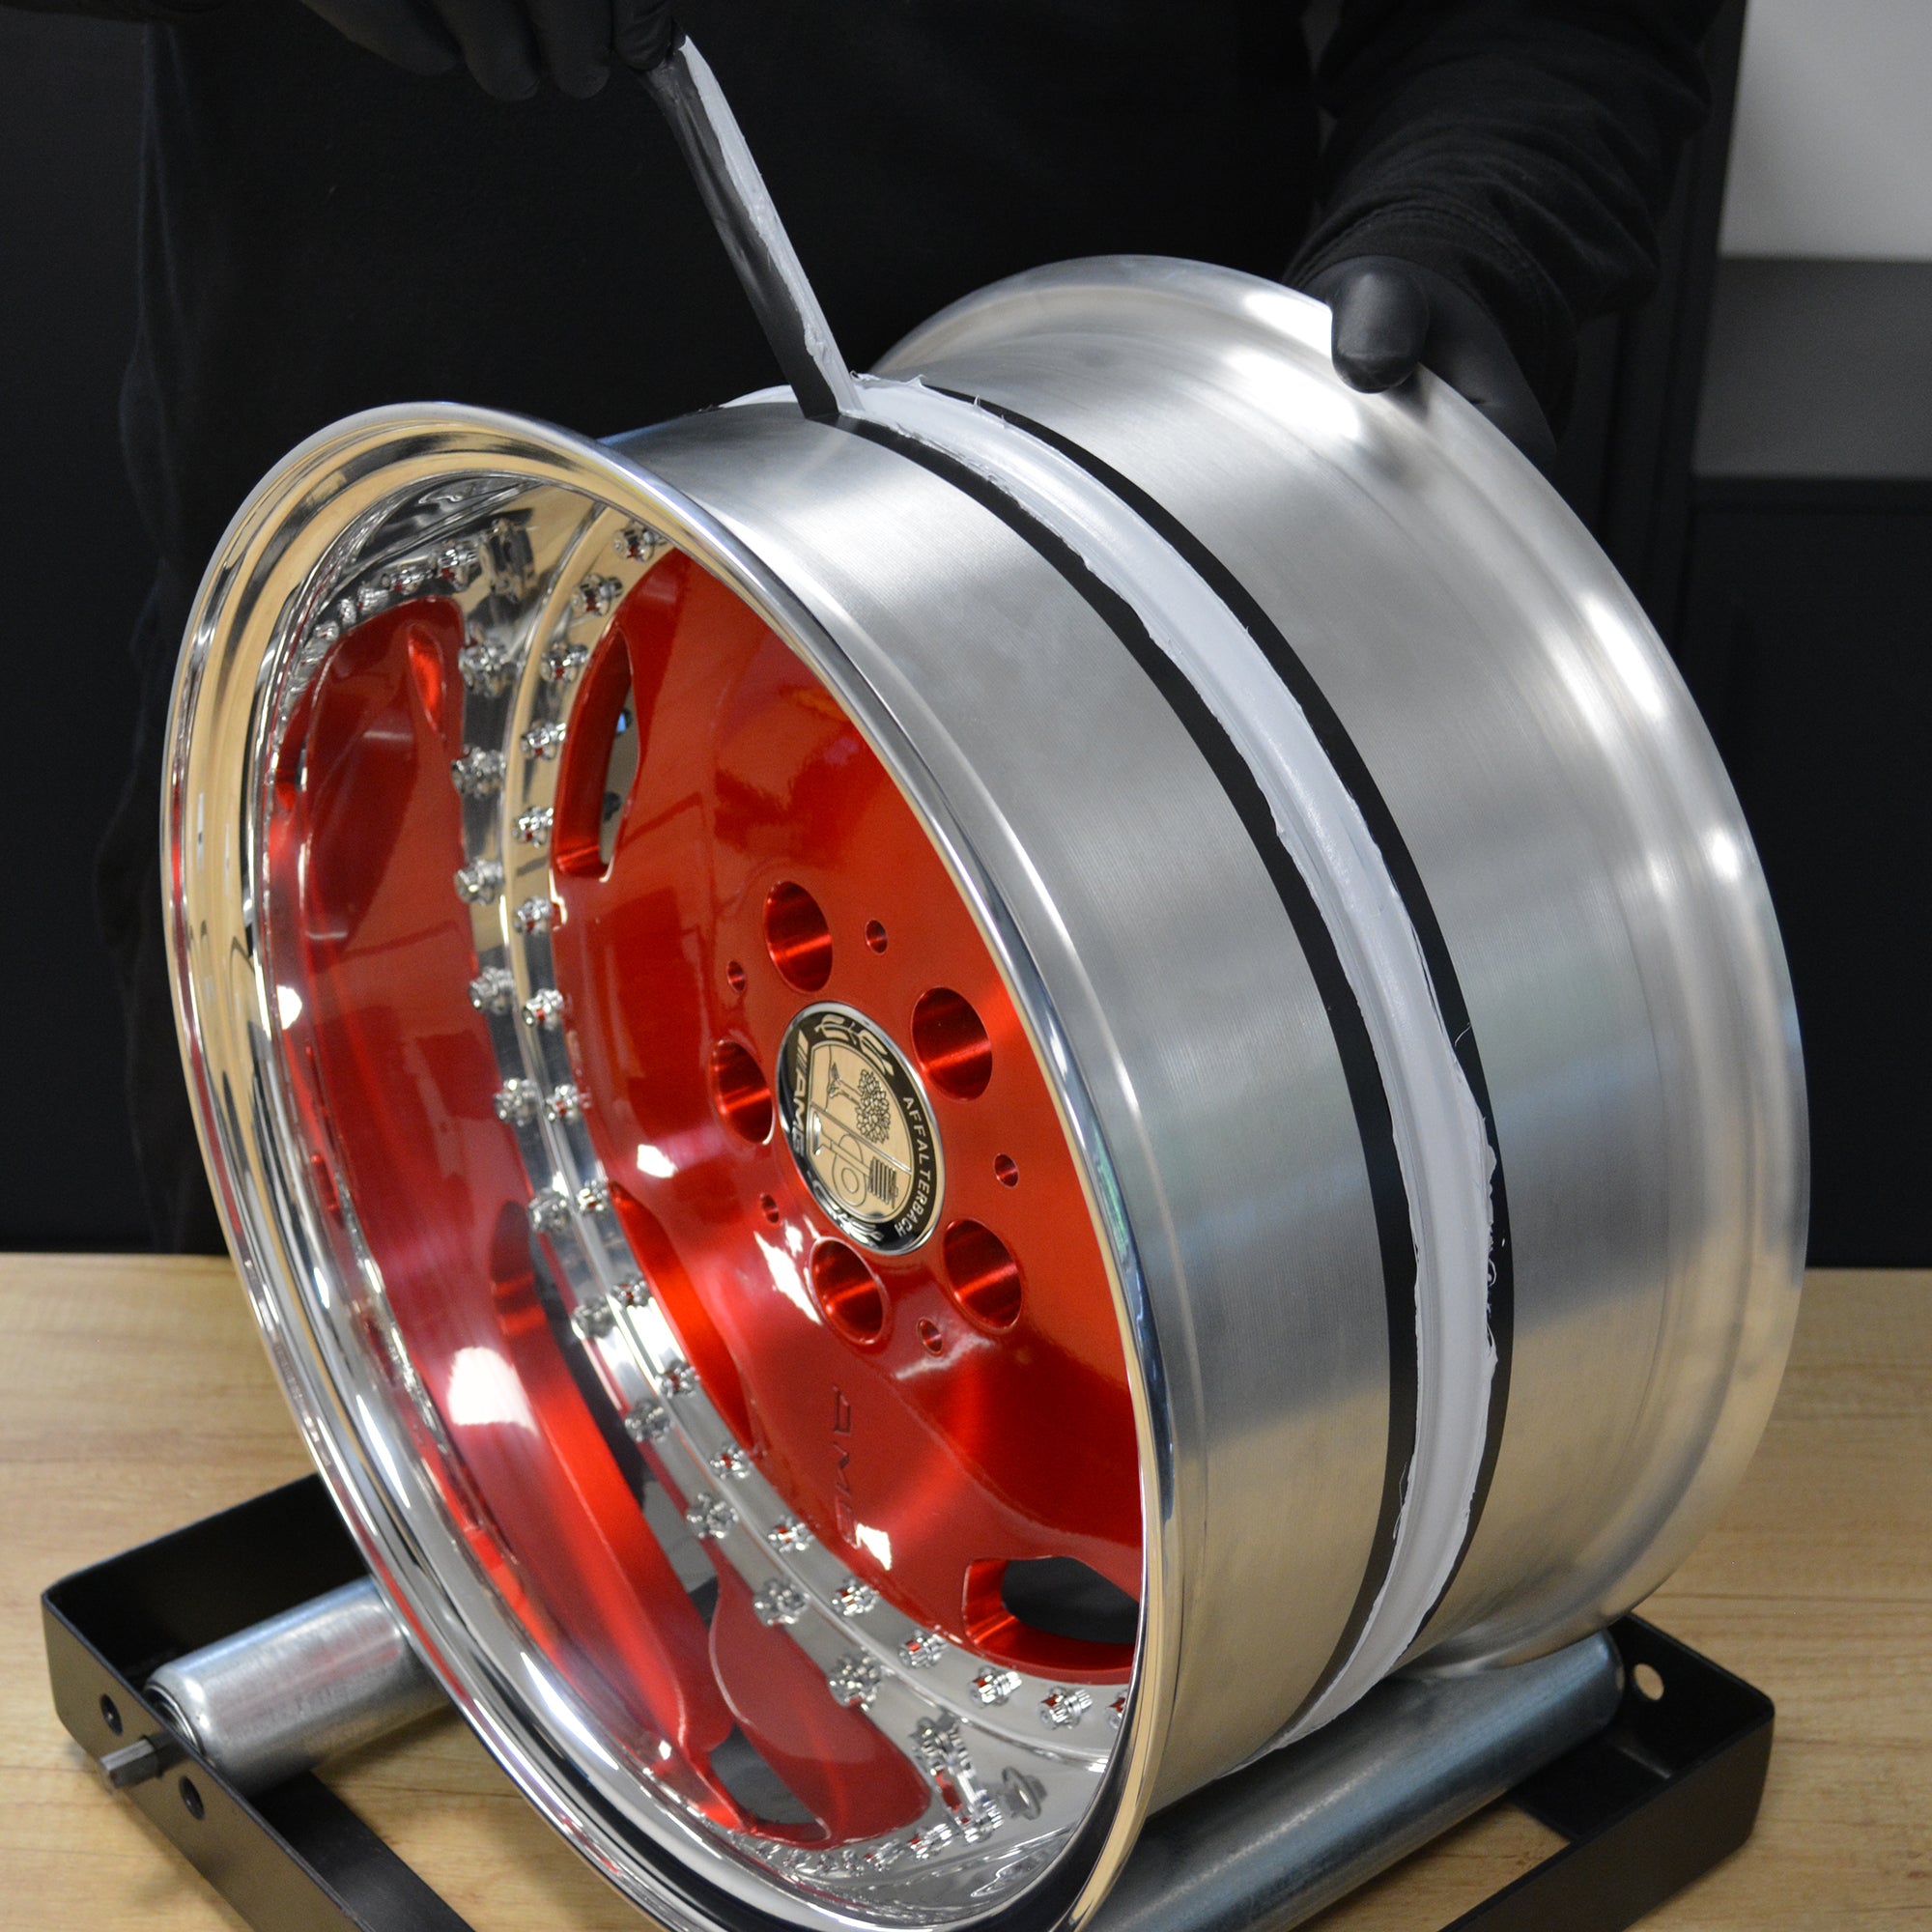
Sealing a three-piece wheel involves ensuring that the wheel components are properly assembled and that any gaps or potential points of entry for water, dirt, and contaminants are sealed to prevent corrosion.
It's crucial to use the right type of sealant designed for wheel applications, as well as the appropriate torque settings for fasteners to prevent over-tightening or under-tightening, which can lead to issues with the wheel's integrity.
Sealant? We've got you covered...1. Check for Tightness: After reassembly, verify that the bolts are securely tightened to the recommended torque settings. Ensure that there is no play or movement between the components. 2. Prepare wheels: Ensure surfaces are clean and dry ready for application of sealant. Use low-tac tape and apply two strips either side of the bond line, and on each component for a clean finish. 3. Applicate sealant: Apply the sealant to the wheel, ensuring to get a nice, light bead which covers the gap between the components. 4. Seal: Using your finger, gently spread the sealant applied against the components to gain a clean, smooth and tight seal to prevent any gaps/holes. This step can be revisited again once sealant has dried to ensure it is air tight if needed. 5. Remove tape: Remove the tape either side of the sealant line on components to leave a clean, even and smooth finish. 6. Dry: Leave the sealant to dry. Please check on the sealant packaging used for drying times etc. Ensure it it fully cured and dry throughout. Your wheels are now complete, ready for tyres and time to stand back and admire.